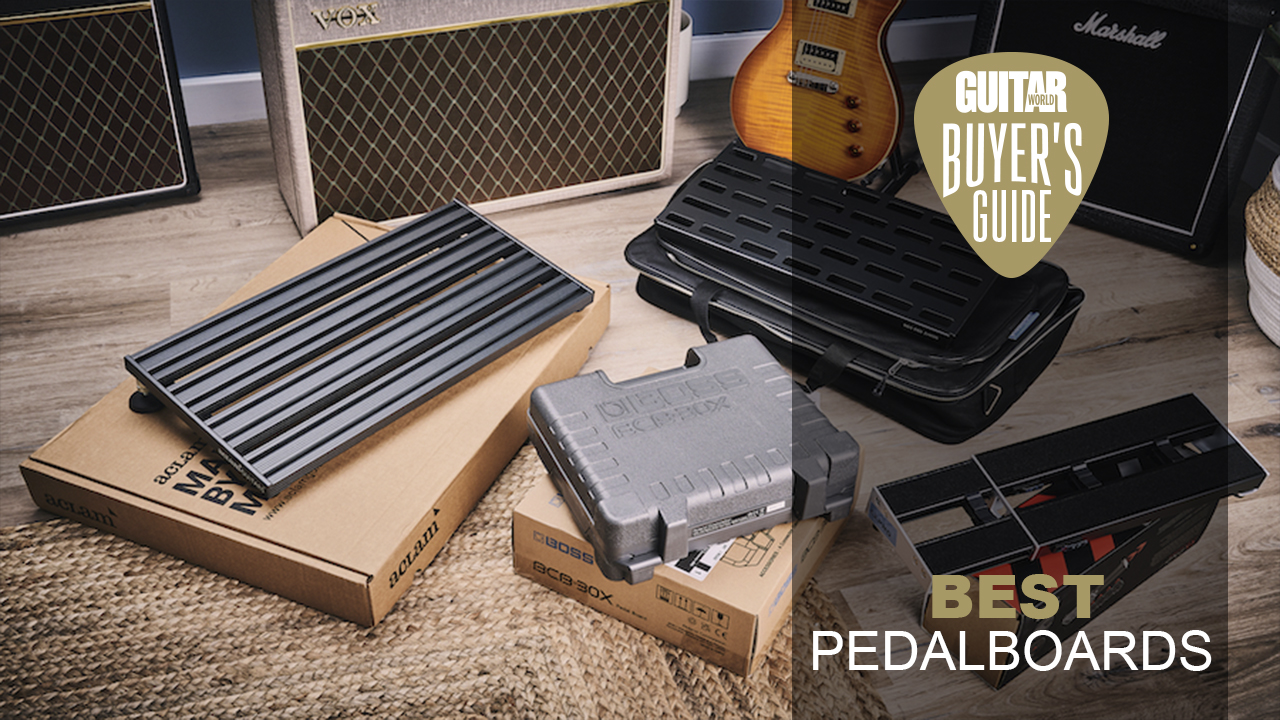
Best pedalboards 2025: perfect platforms for your pedals, tested
I used 10 pedalboards from Fender, D’Addario, Pedaltrain and more at home, in the studio and on stage to find out which ones are worth stomping on
All the latest guitar news, interviews, lessons, reviews, deals and more, direct to your inbox!
You are now subscribed
Your newsletter sign-up was successful
The best guitar pedalboards make it possible for you to realize more complex effects combinations, simplify setting up for rehearsals or shows, and trivialize traveling with your guitar rig. I personally tested each of the ‘boards featured in this guide, using them just as I use my daily-driver pedalboards between band rehearsals, songwriting sessions, and studio bookings. Within each product entry, I've included my thoughts, plus photos of the ways I tested, set up, and used each board.
A good pedalboard gives you everything you need to achieve your sound – from pedals and power supplies to the patch cables and wires that connect them all – is neatly and securely locked down to ensure plug-and-play consistency every time you pick up a guitar, go to the studio, or arrive at soundcheck. And if something does go wrong, it’s so much easier to find out what!
Each pedalboard excels in its own way, but I found one to be the best of the bunch overall: the Fender Professional Small. It’s generously sized for a ‘small’ pedalboard, and its universal power supply bracketing system is just straight-up kind engineering. Building your first pedalboard? Have a look at the Boss BCB-90X, which is a great all-in-one solution that's super easy to set up and maintain.
To find out what else made the grade, read on; if you’re new to pedalboards and don’t know quite what you’re looking at yet, I’ve put together extensive how-to-choose and FAQ sections.

“I’m a guitarist of over two decades, over a decade of which I’ve spent playing with bands both out and about and in the studio. I’m also a guitar pedal obsessive, with an eclectic collection of effects and utilities that afford me the ability to mothership my way through studio sessions and live sets alike. As such, I’m perfectly placed to evaluate the merits of the ‘boards in this guide in various practical settings."
How I tested: Each pedalboard was thoroughly used in a range of different situations and conditions, all the while treated as if it were my main pedalboard for each task. I evaluated how easy it was to populate and de-populate each board, as well as their respective behaviors in active use, both in the studio and during live rehearsals. Read more on how I tested the products for this guide.
My top picks
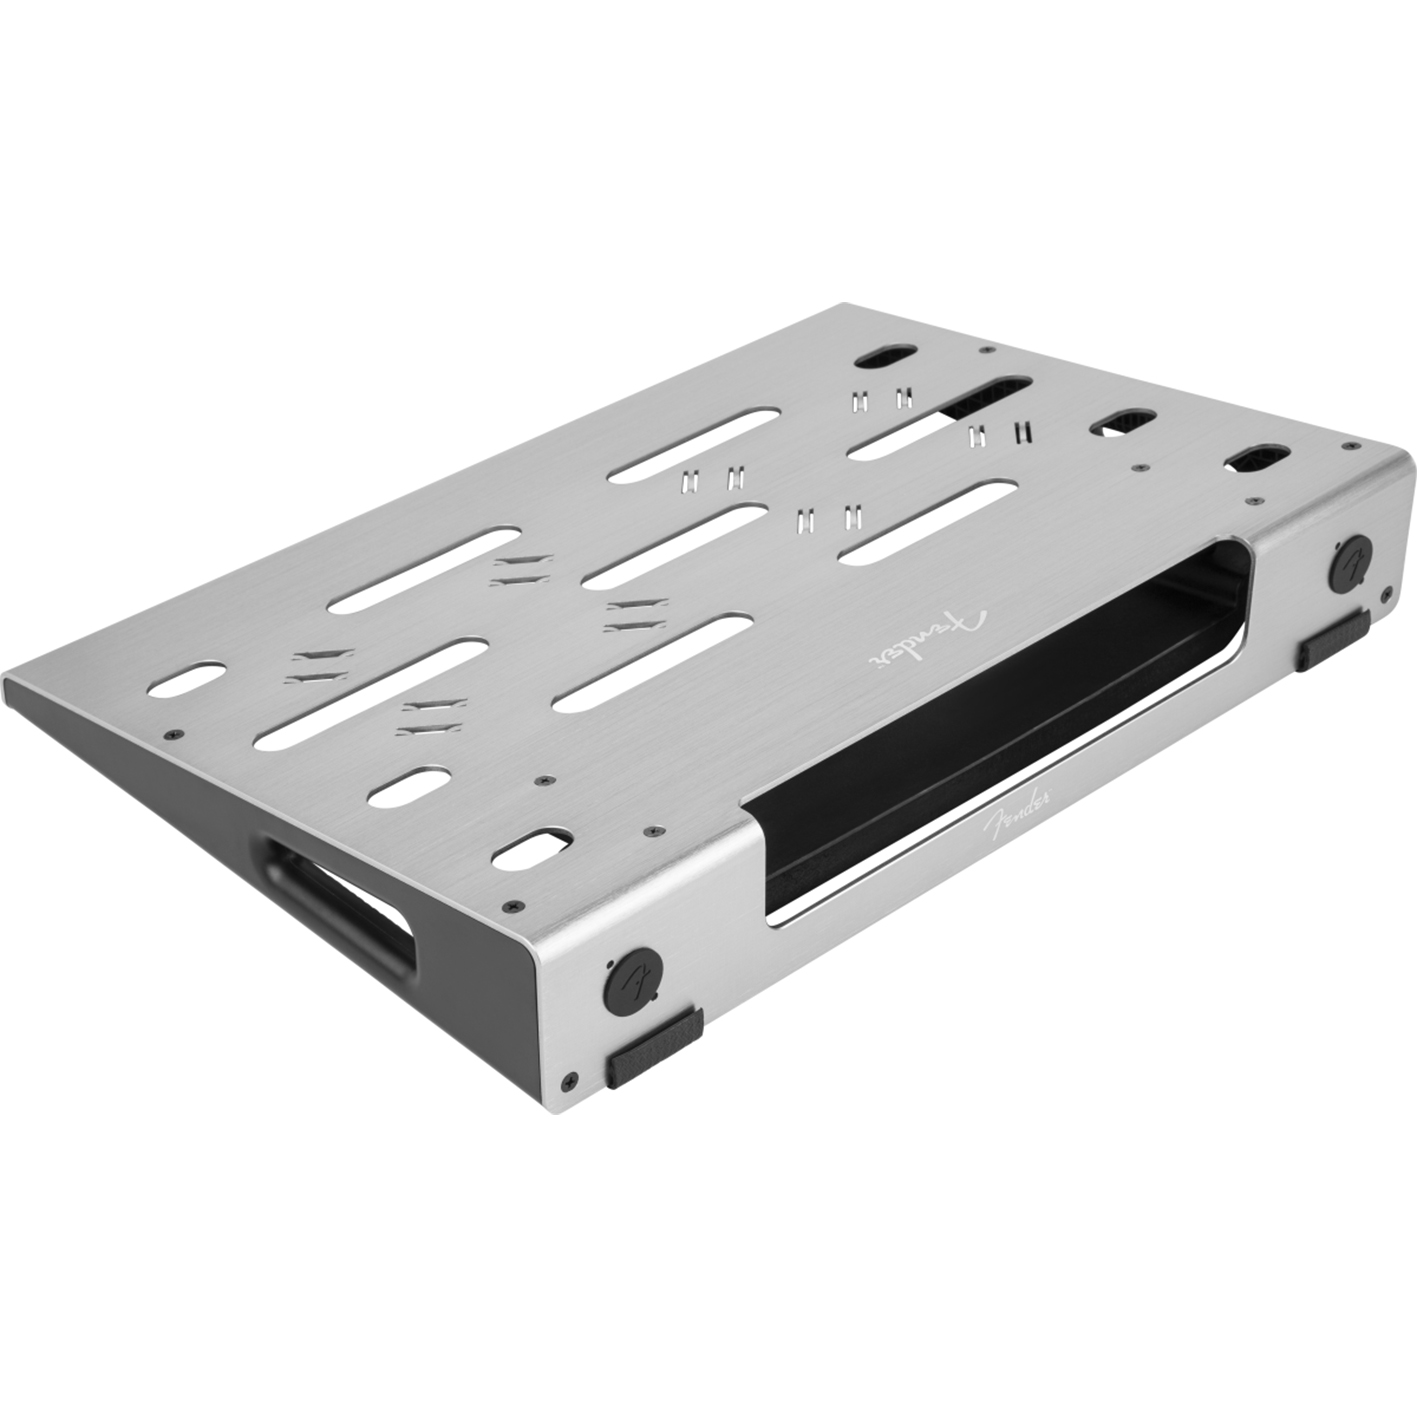
This model edged in front of the others as my favorite overall. There’s a lot to like, but the winning feature for me was the on-board power supply clamp – a basic contraption that democratizes the whole thing. With decent real estate and a fair amount of swank-factor too, this is an ace all-rounder.
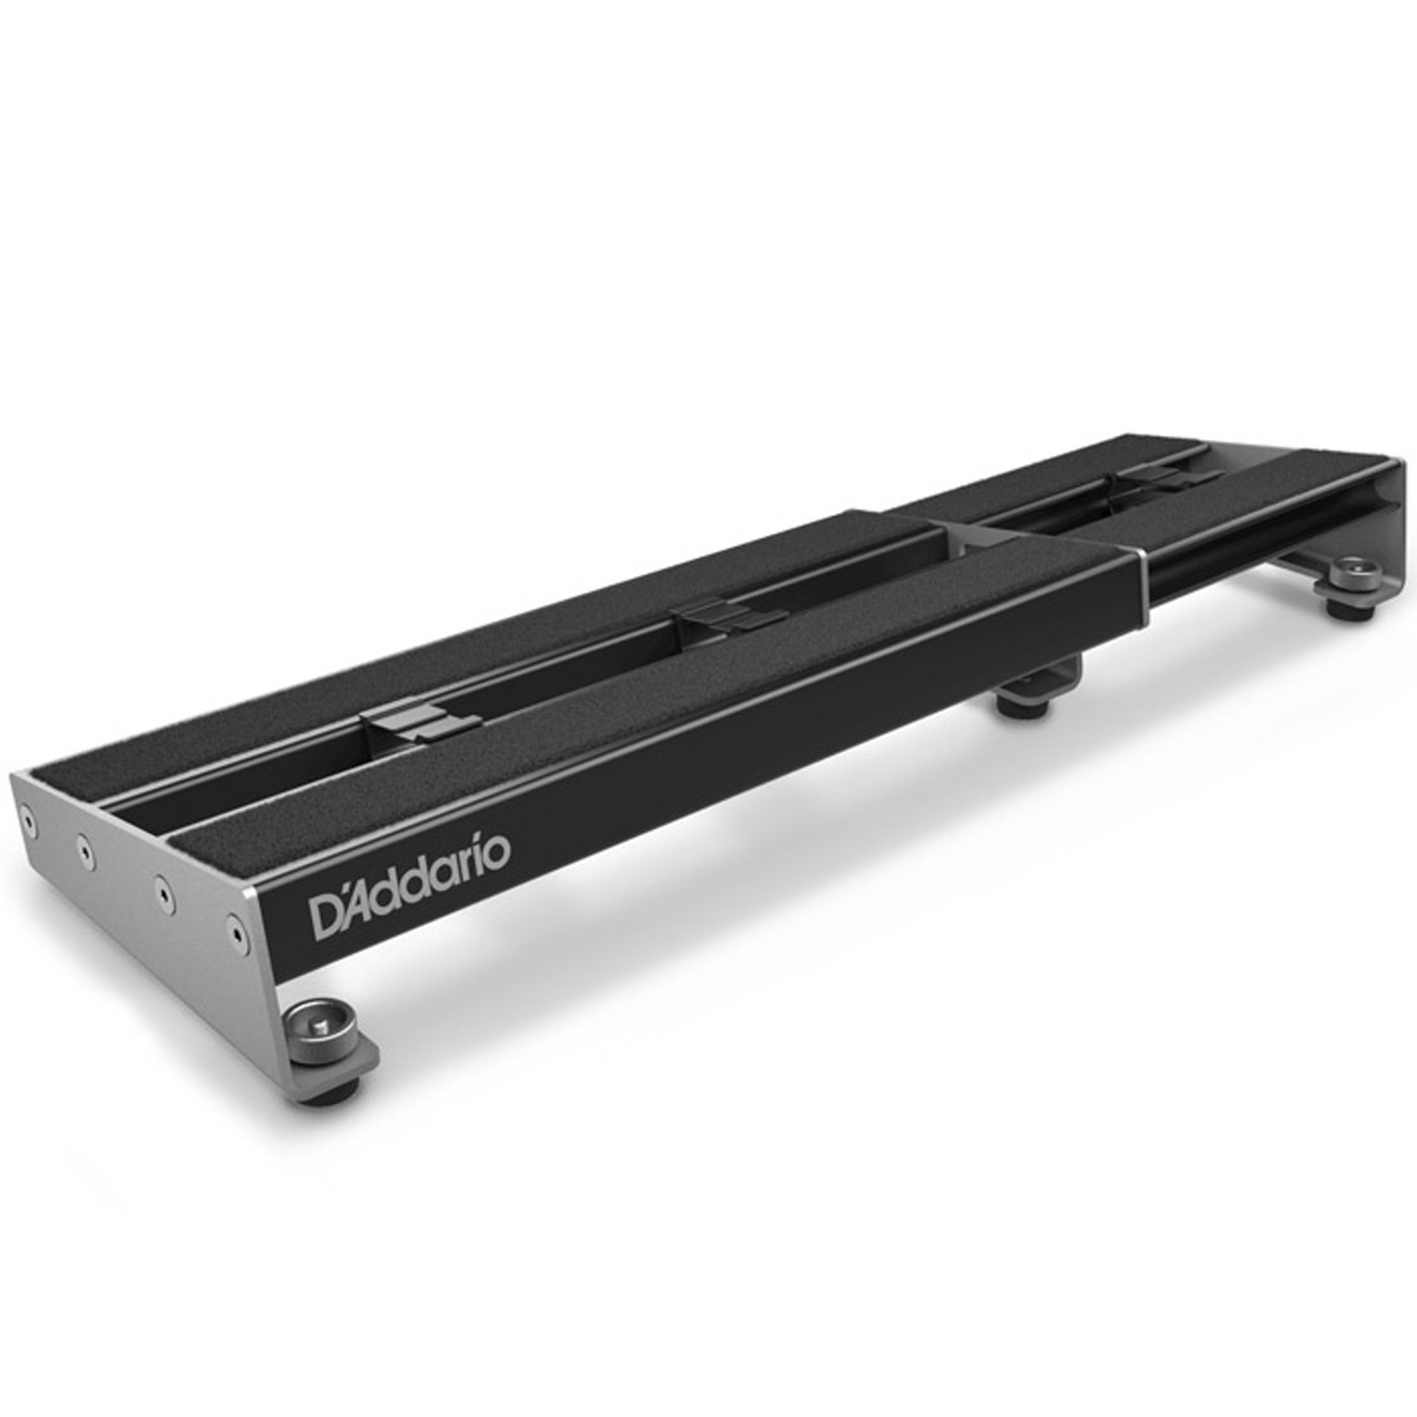
I was convinced I wouldn’t like the XPND 1 very much – and never has my mind been changed so swiftly or resolutely. This telescopic pedalboard can nearly double in size, and feels sturdier than most other options on this list. It’s an asset to small studios and cramped vans everywhere.
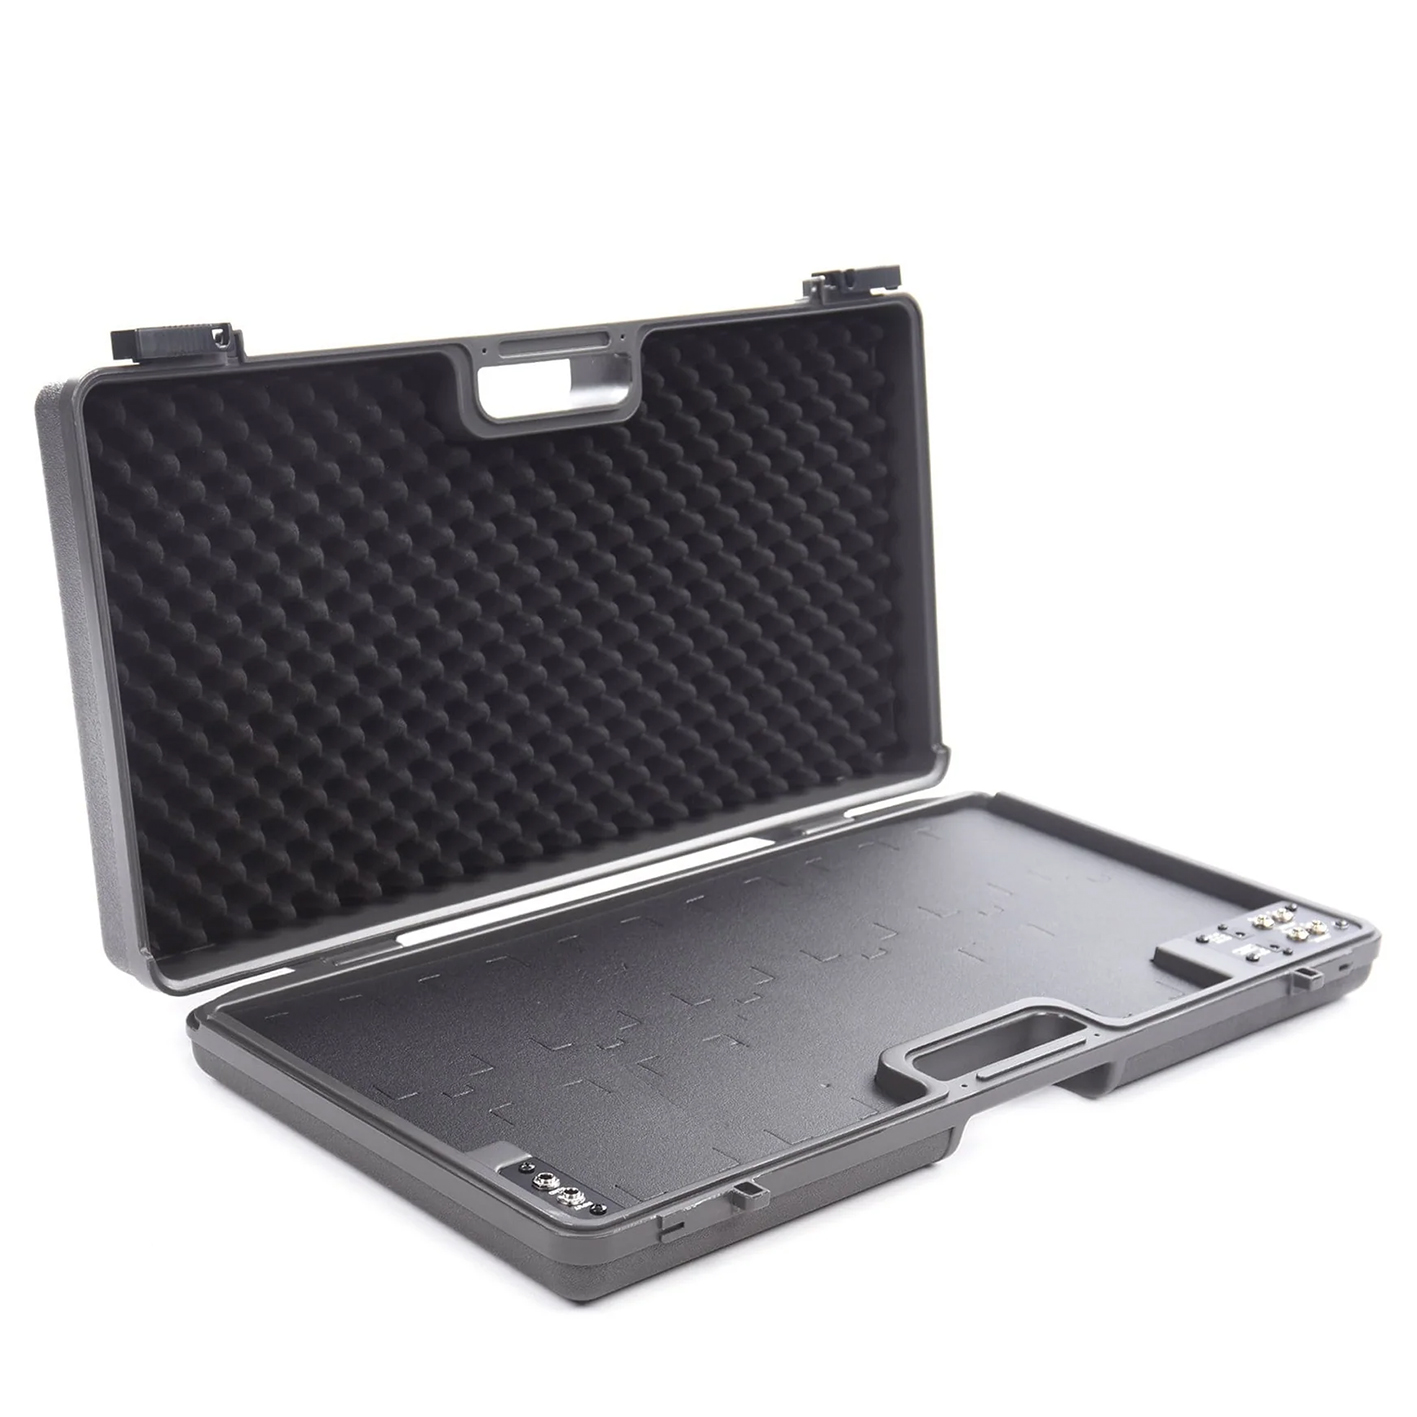
A fantastic starter pedalboard. It’s a cohesive unit, with a patchbay for easy pluggin’ and a bundled power supply for easy powerin’ – to say nothing of the fact it’s housed in its own carry case. You need to take a knife to the foam to fit your pedals, which is a little unnerving to start – but the result is an easy-going board that’s easy to grow.
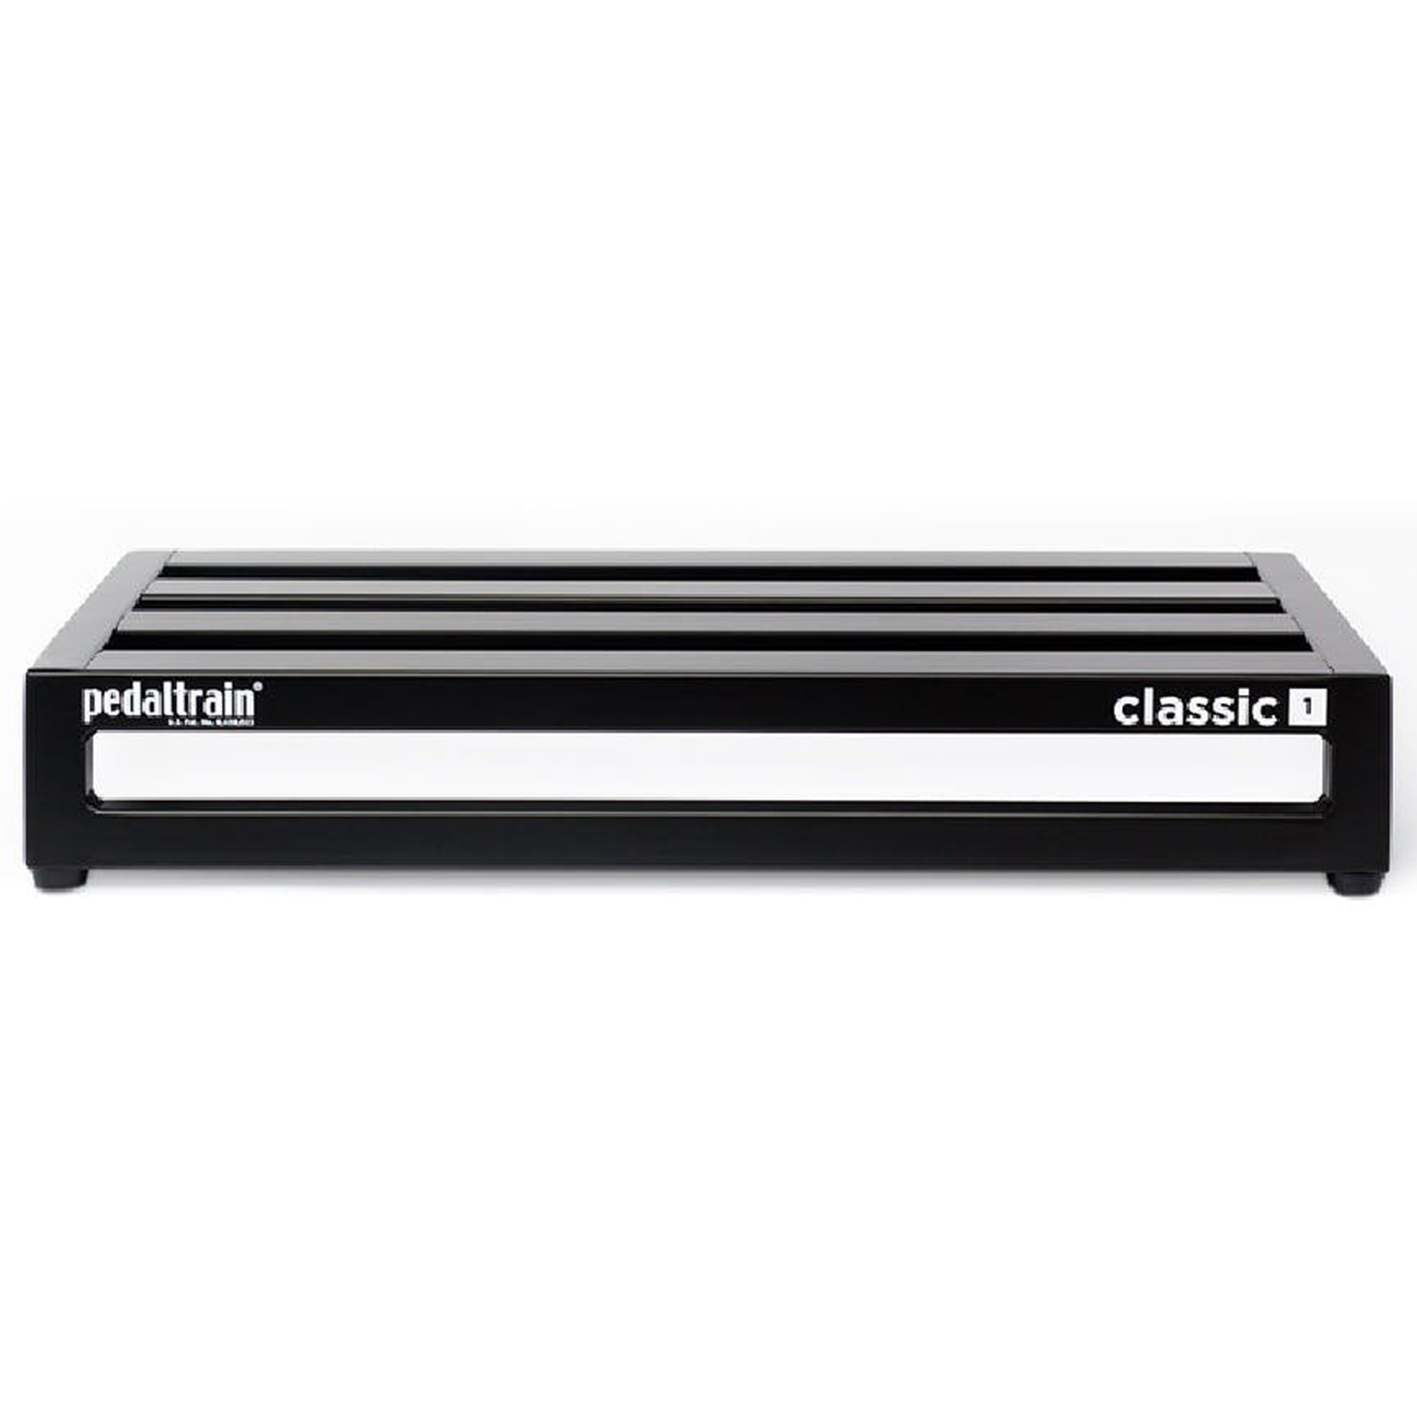
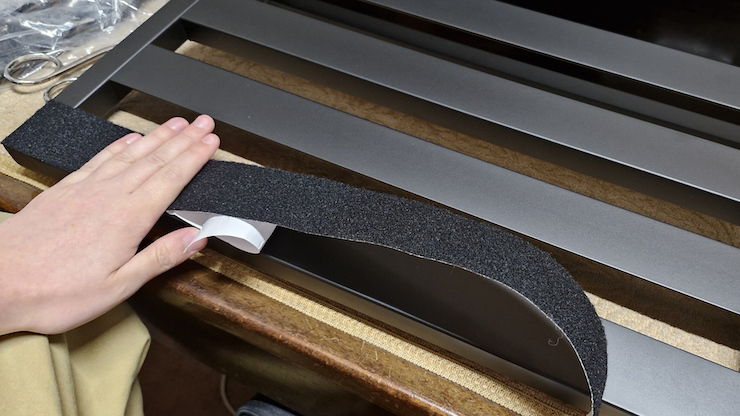
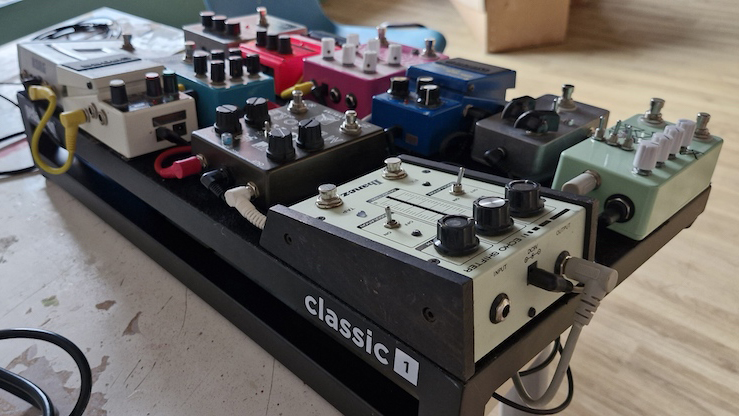
‘Classic’ is apt and accurate for the Pedaltrain Classic 1 – a larger medium-sized pedalboard with plenty of space and a sturdy frame providing it. I think it’s a great touring pedalboard, for its all-angles access, hardy build and easy carriage.
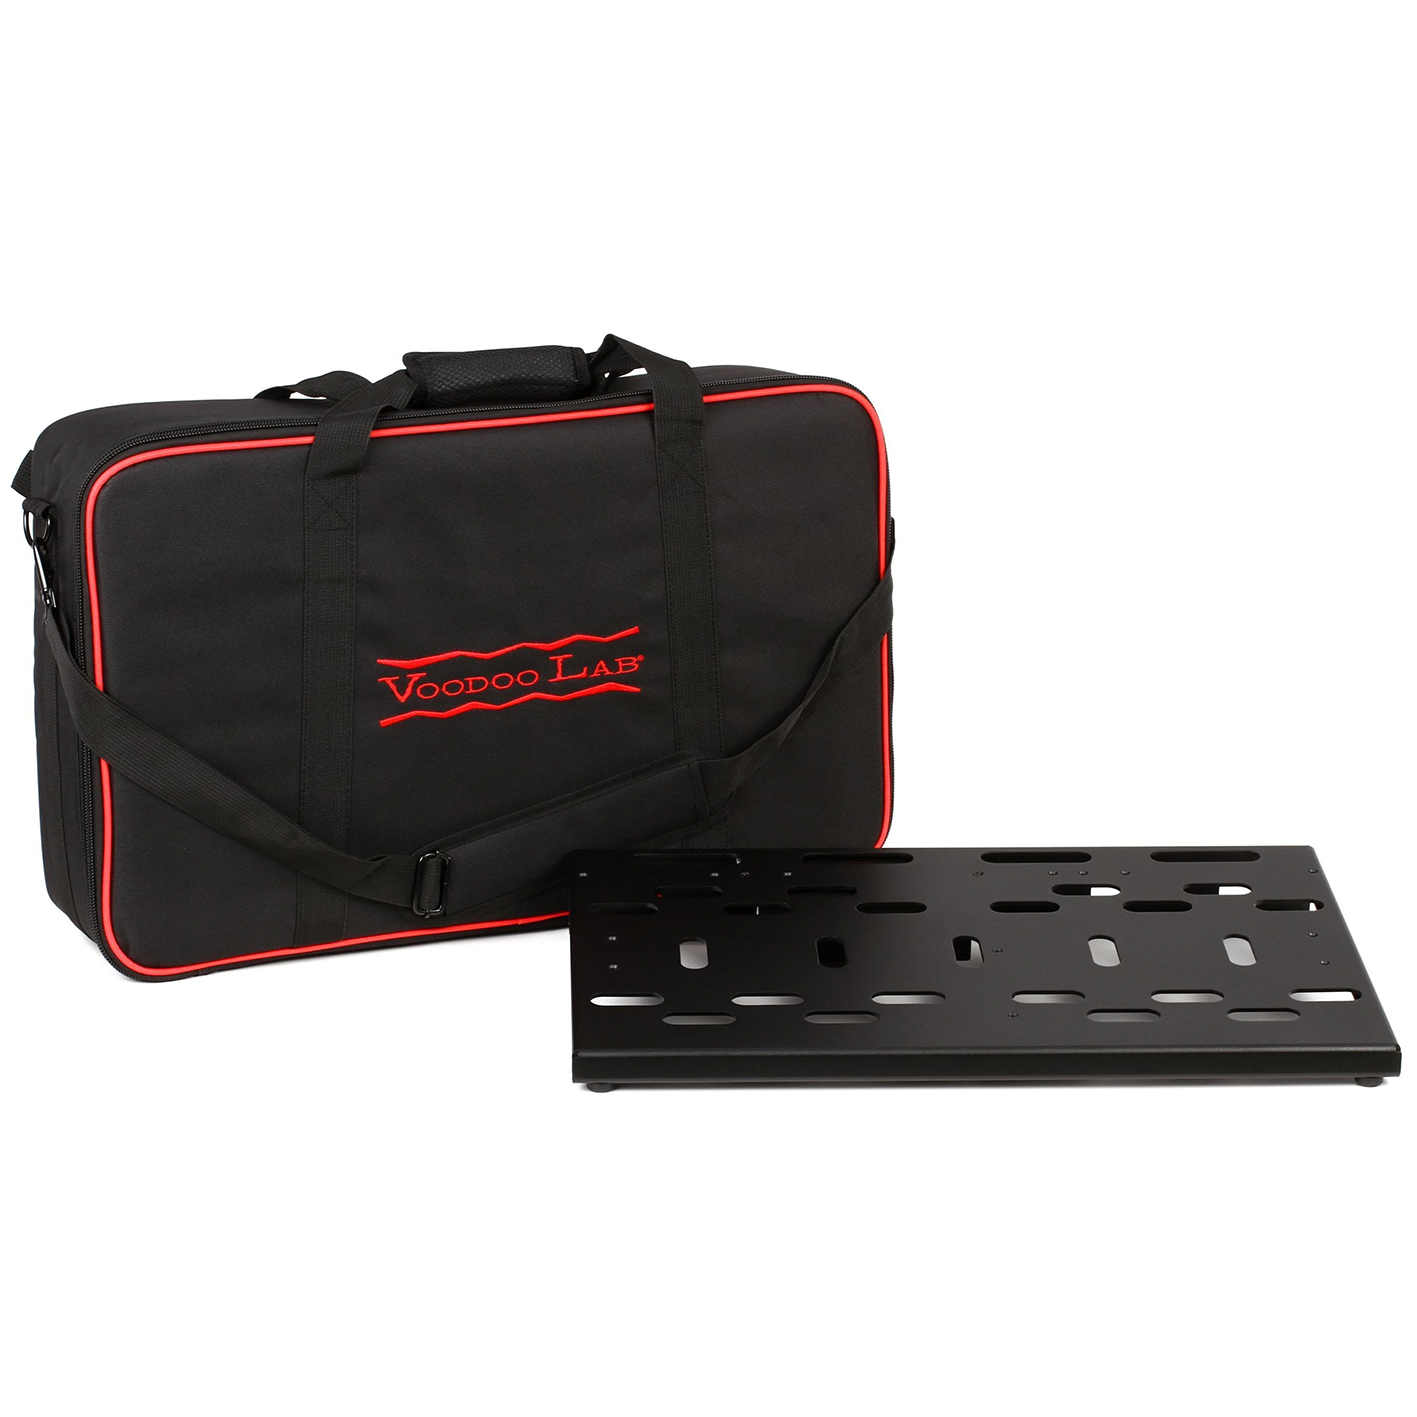
About as light as you could ever get a pedalboard, seemingly without sacrificing structural integrity in the process. It’s easy to set up and even easier to travel or commute with (special thanks to the rockin’ carry case); combine it with some considerable pedal-space, and you’ve got an easy-moving winner.
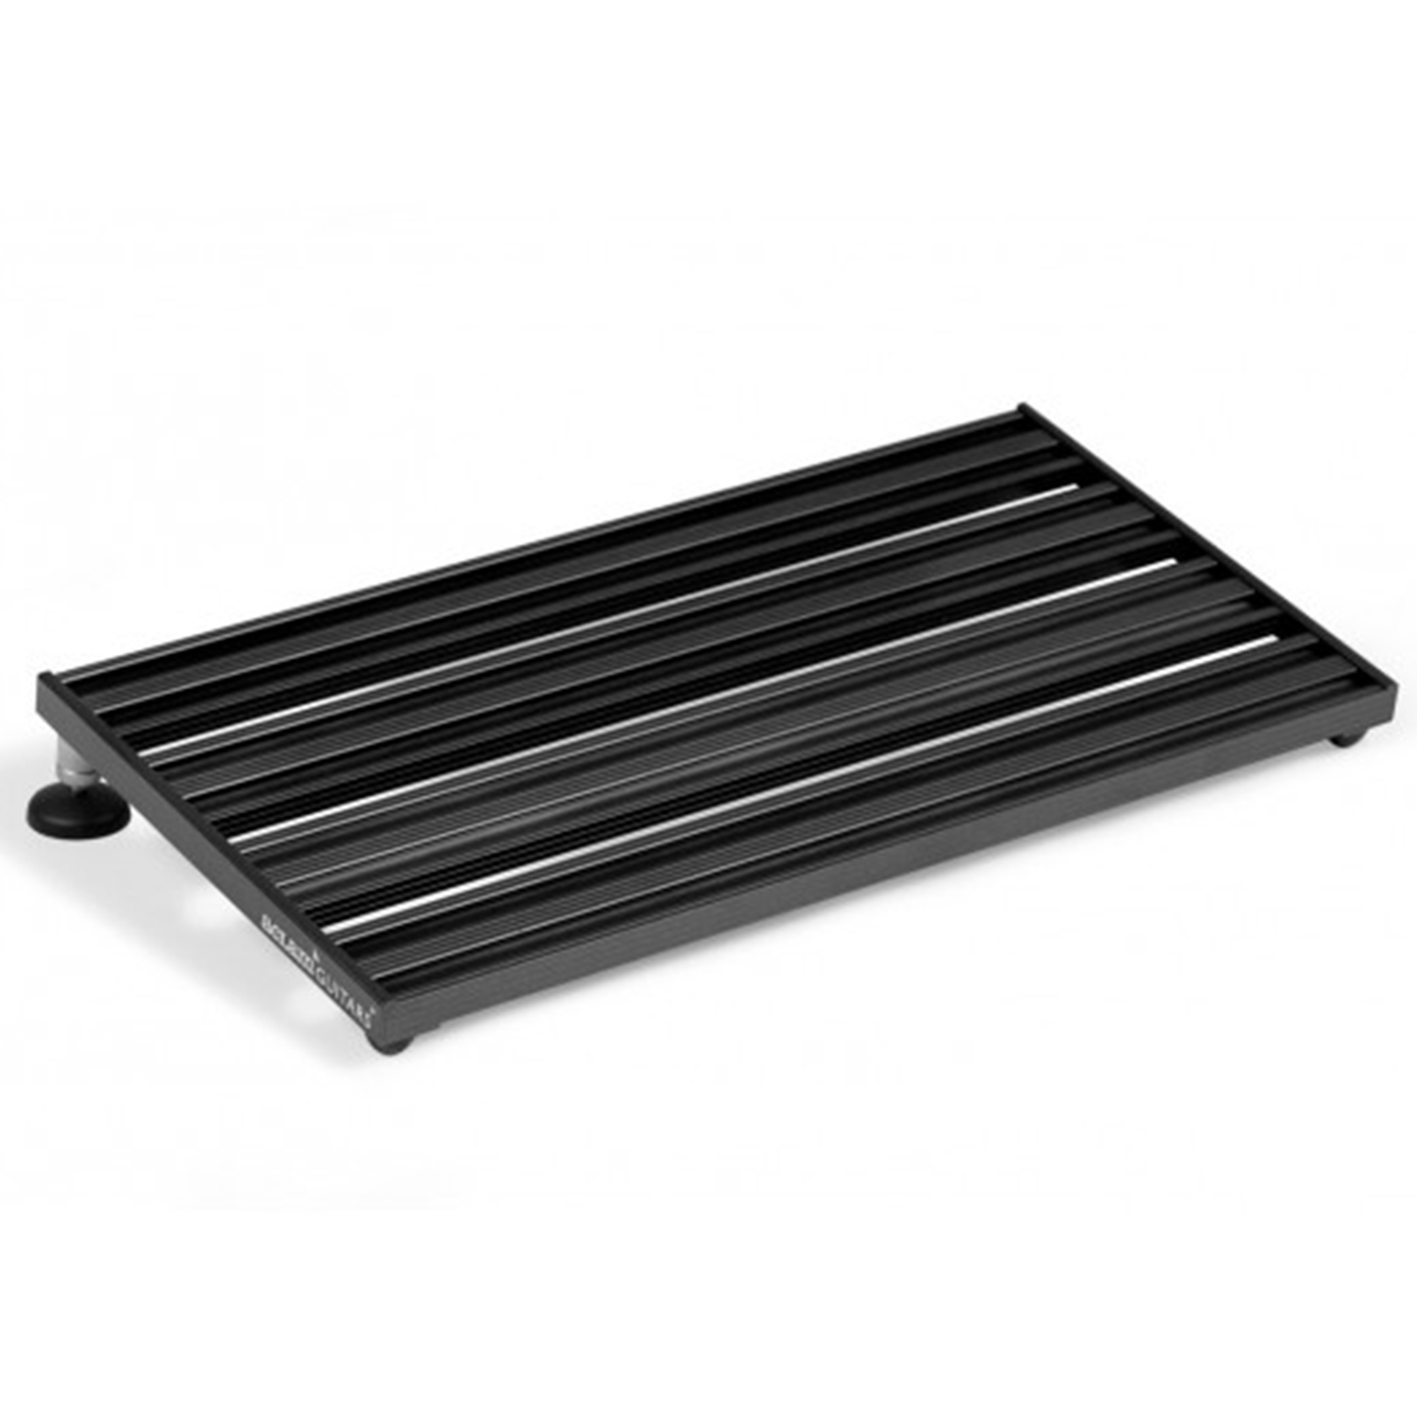
The Aclam Smart Track S2 is a bit of a Marmite pedalboard. It eschews hook-and-loop entirely, for a new system of pedal affix-ation that doesn’t leave gunk and junk on your precious investments. It’s fiddly and time-consuming, but what’s a little time for the safety and security of your rarest guitar pedals?
Best overall
1. Fender Professional Small
Our expert review:
Specifications
Reasons to buy
Reasons to avoid
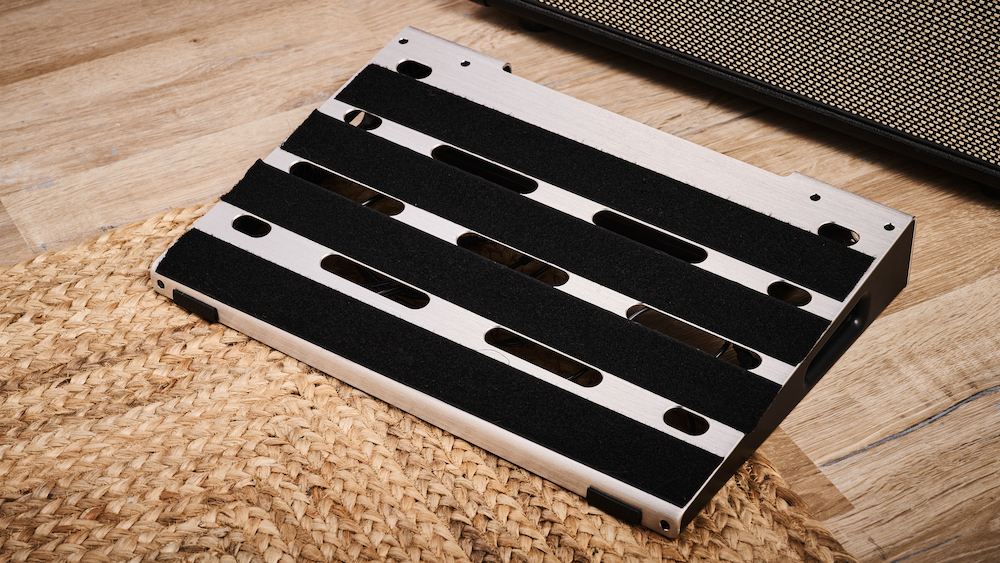
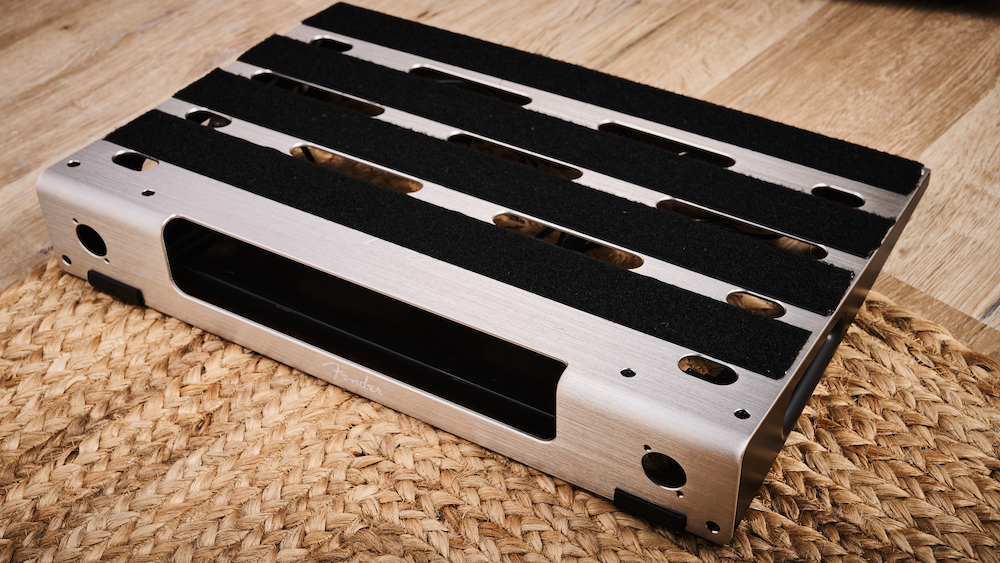
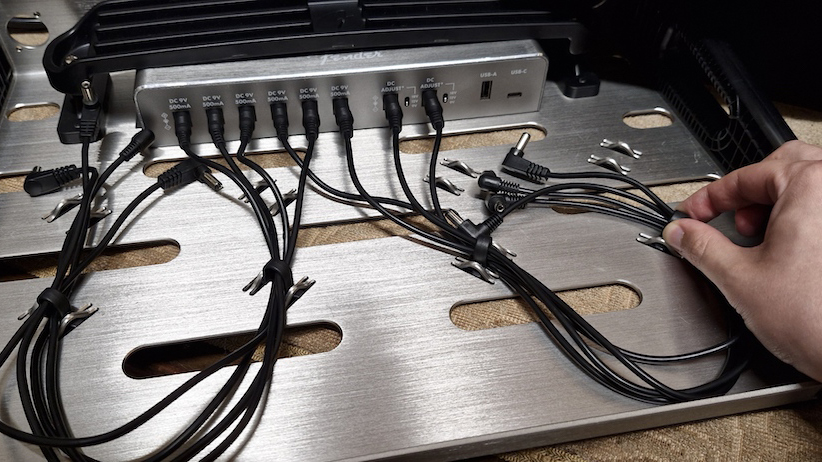
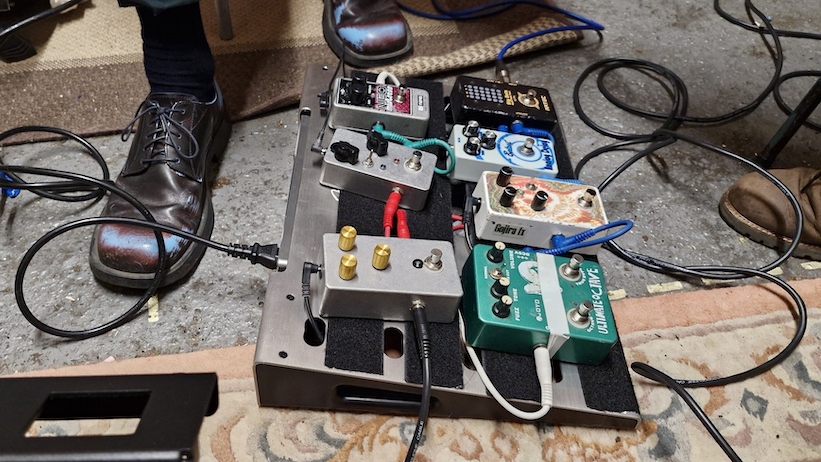
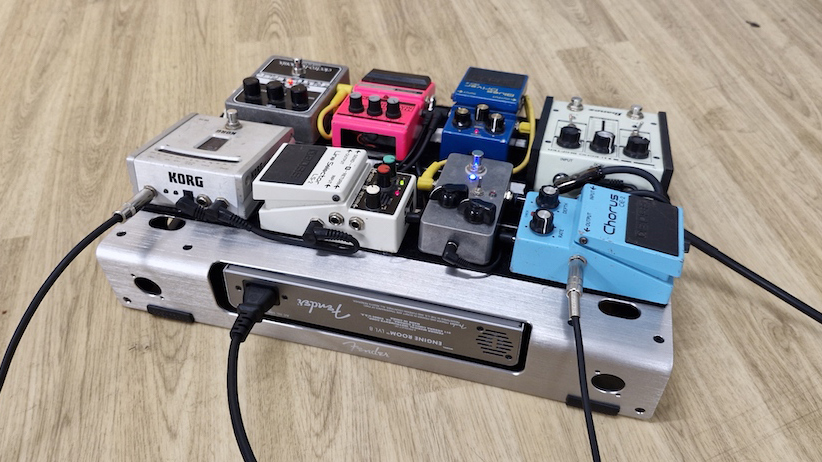
What is it? Fender’s Professional-series pedalboards are beautiful brushed-aluminum pedal platforms, part of the same development thrust that gave us their beautiful brushed-aluminum pedal range. This, the Professional Small model, is the smallest of the Professionals, and far from small by any count; and ‘professional’ perhaps, for a smattering of guitarist-friendly features that set it apart. There are Medium and Large variants also available. For the testing and photography of this product we used our own Fender Medium ‘board as, at the time of testing, Fender was unable to supply us a Small model. However, aside from the dimensions, the features and build quality are identical.
Build quality: The pedal surface is a precision-bent sheet of anodized aluminum, with well-spaced cutouts for feeding cables through – spaced perfectly for 50mm Velcro to fit between. Two plastic cheeks nestle either side of the sheet, with handles for easy lifting (handles which, incidentally, were perfect for my small mitts, but might be a tight fit for larger hands). The attention to detail is great for the price – my hands never found any unduly sharp corners, edges or burrs.
Key features: The Fender Professional Small is an uncomplicated piece of equipment, but one which, again, benefits from considerable attention to detail. The sheet surface is designed such that you can place your pedals however you’d like, as opposed to in the neat rows demanded by slat-format ‘boards. The prodigious placement of cut-out slots maintains ease of access to the underside – and two holes on the rear add more clean accessibility, by enabling you to install your own throughputs if you wish.
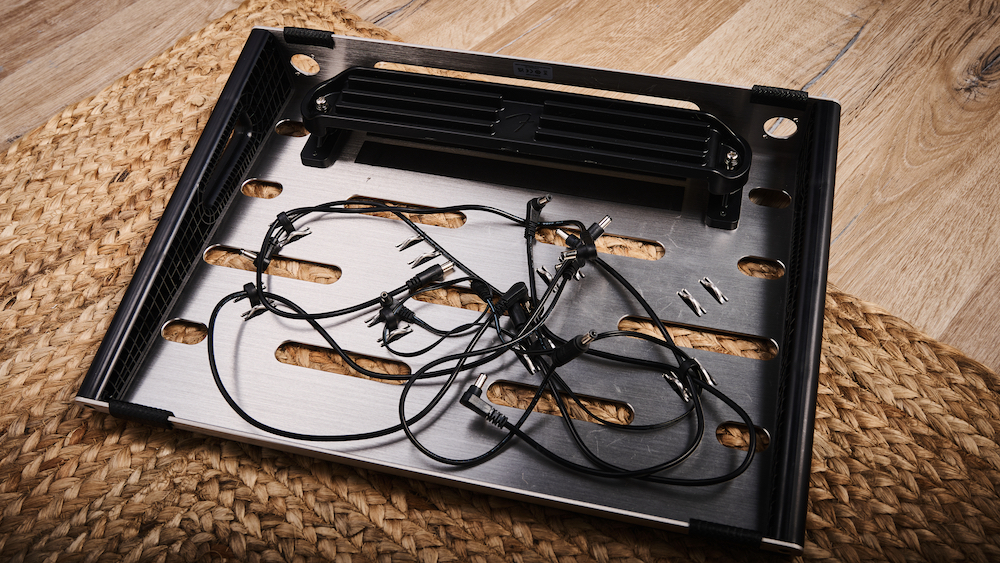
The Professional Small’s major boon, though, is its built-in pedalboard power supply clamp. It isn’t much, but it is a great deal more than many other pedal brands offer even as paid add-ons – and a pleasingly universal solution as well. In keeping with the usefulness, Fender also includes a minimalist cable management solution that saves you from relying on cable ties; plastic cable brackets hook into the underside of the pedalboard’s surface, so you can channel cables fuss-free.
Performance: Indeed, setting up this pedalboard was a fussless dream. The clamp trivialized mounting my power supply, for one. The clamp was by no means flimsy, but still flexed a little when tightened – not great, but no huge issue unless your power supply is on the taller side. The easy-release cable management clips made running wires so much less fiddly than I’m accustomed to.
The pedalboard does flex a little bit when you place your weight on it, but I didn’t find this to be at all problematic, even during raucous punky rehearsals. Besides, I’ll take a little flex for the considerable ease with which this board can be set up, packed down and whisked away to the next thing.
Final verdict: The Fender Professional Small is an excellent all-rounder pedalboard option, with a great deal of little things going for it – from the power supply clamp to the easy-carry side grips to the quick-release cable management and beyond. It’s not the largest and it’s not the sturdiest, but it is a hugely reliable pedal platform for both homebodies and guitarists on the move.
Best compact pedalboard
2. D’Addario XPND 1
Our expert review:
Specifications
Reasons to buy
Reasons to avoid
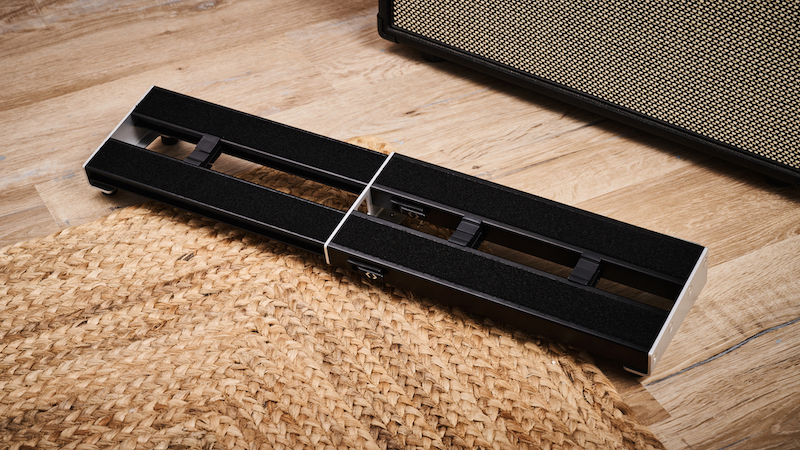
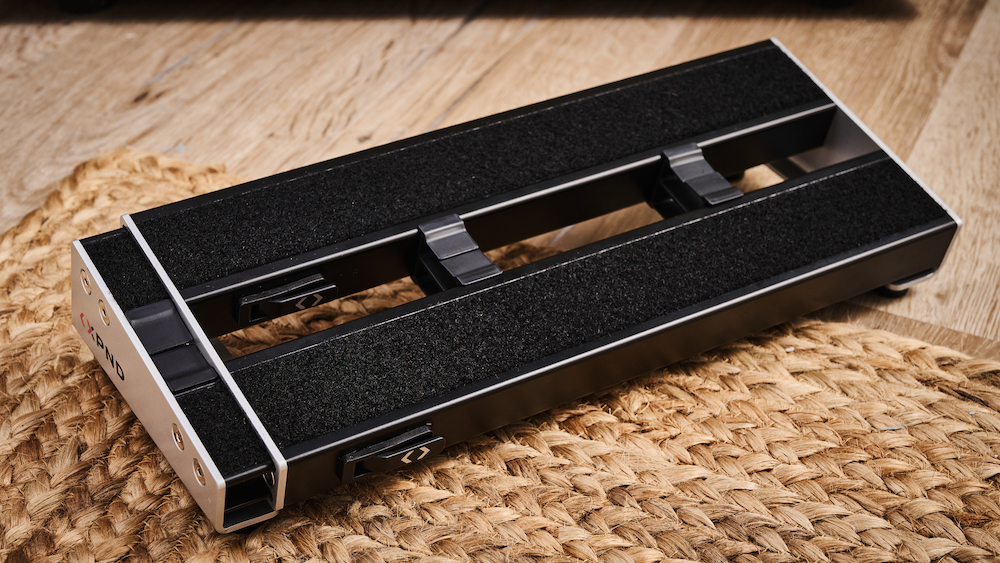
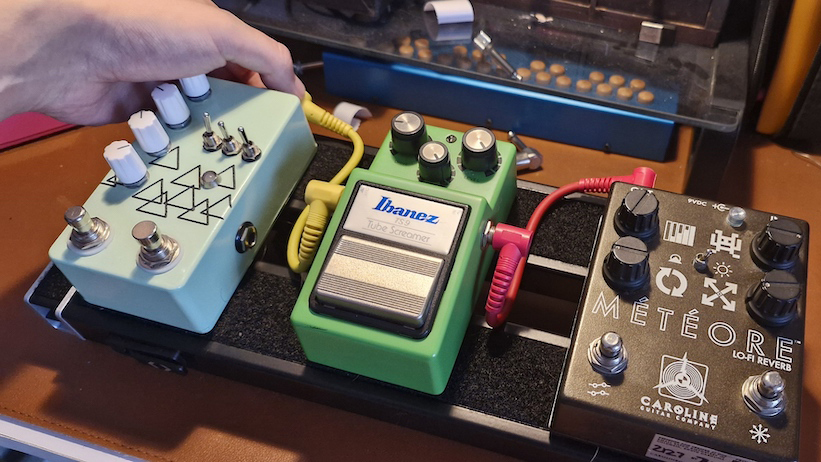
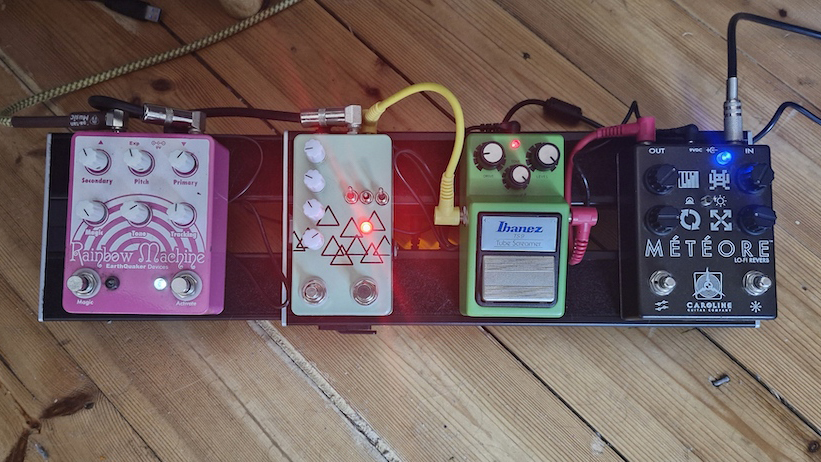
What is it? The D’Addario XPND 1 is a small, self-build telescopic pedalboard that, in short, contains more of itself. It’s the smaller of two XPND pedalboards in D’Addario’s increasingly expansive (geddit?) range, aimed at portability and modularity for the active guitarist.
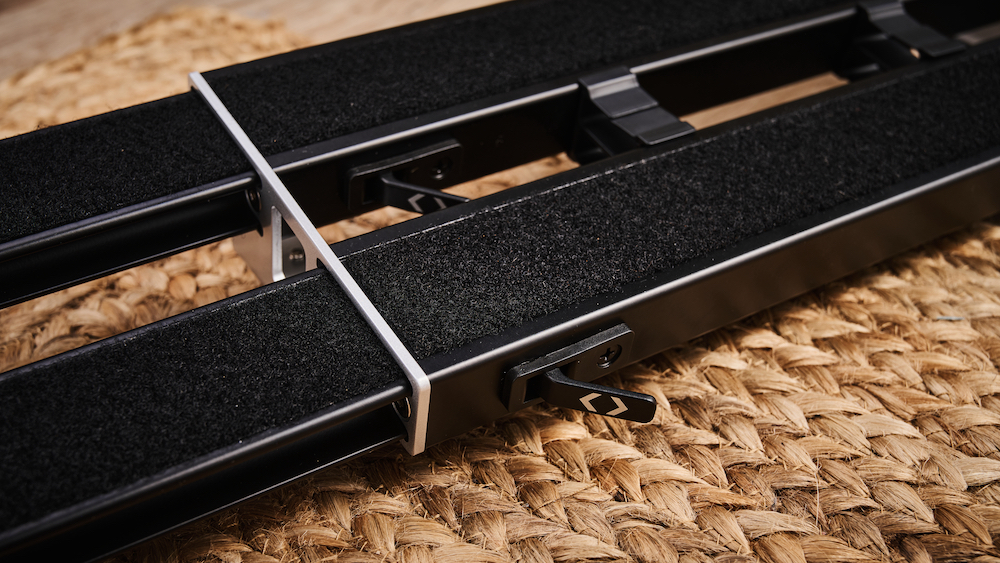
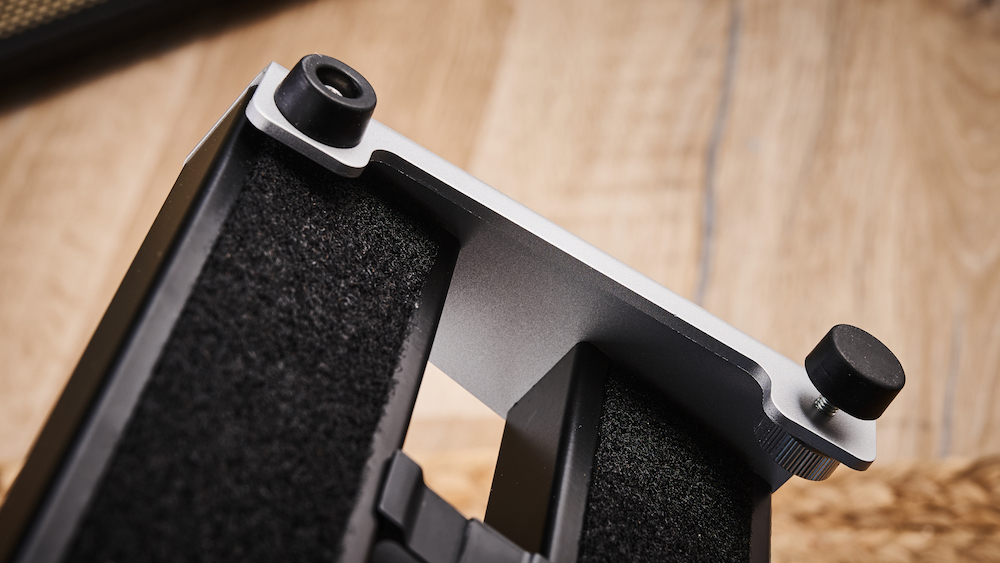
Build quality: The XPND 1 arrives ‘flat-packed’, but doesn’t take long to get assembled. Countersink hex screws (attached with a provided hex key) serve to lock the footers in exactly where they need to be, resulting in a solid finished product. The struts are thick aluminum and quite simply aren’t going anywhere when your feet get involved. Two soft plastic braces are also supplied to support the rails, which neatly double as runners for your power cabling.
Key features: The XPND 1’s major USP is, of course, that it xpnds. The XPND 1’s telescopic rails increase the pedalboard’s working surface area by almost double, and can be locked at any level of extension by two quick-release mechanisms; mini-pedals could fit on a fully-xpnd-ed XPND 1 by up to (almost) a dozen. I swapped and changed a few times, but found equilibrium with an un-xpnd-ed three-pedal core setup, that guaranteed my feet fuss-free access to each switch.
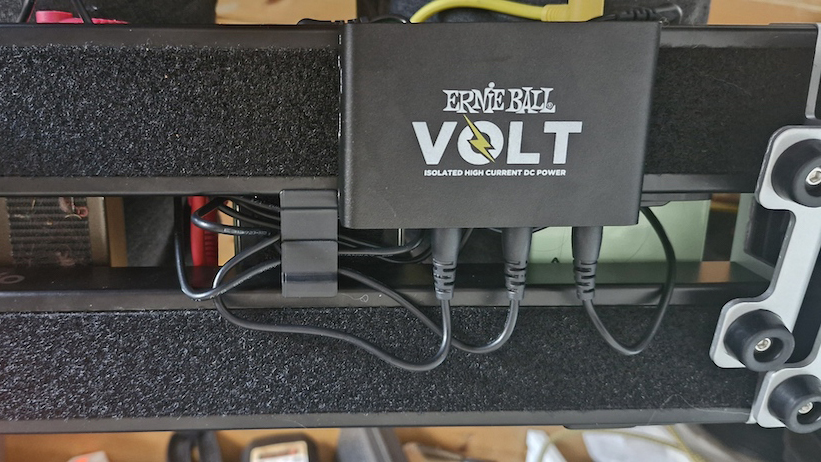
The XPND 1 also comes pre-adorned with loop Velcro on both sides, so you don’t have to faff with prepping it for your pedals or for attaching power supplies to the underside. My power supply du jour was an Ernie Ball Volt, which fit under the upper strut with ample room to spare – though, granted, the Volt could fit in a grilled cheese if it wanted to. Especially stout pedal power supplies might struggle, but most won’t, as the XPND 1 has adjustable feet providing up to 50mm and 30mm clearance either side of the rear rail.
Performance: I’ve played with telescopic lightsabers in my youth. As such, I reflexively expected a similar level of insincere flimsiness from a telescopic pedalboard. Although there is a little flex in the XPND when fully extended, ‘little’ is the operative word; the whole thing is pretty darn robust under-foot, with minimal give in any direction. The rubber feet were delightfully grippy on my hardwood floor, too, so no slipping and sliding around while my hands were otherwise engaged with either guitar or keyboard.
Final verdict: I thought I wouldn’t get on with the D’Addario XPND 1, but I’m particularly glad to have been wrong about that. It’s a great, affordable mini-pedalboard solution, and its xpnd-ability isn’t the gimmick some might initially think. For me, it became a perfect home studio ‘board, able to adapt to the differing needs of demos and session-guitarist projects without ever taking up more room than it needed to.
Best for beginners
3. Boss BCB-90X
Our expert review:
Specifications
Reasons to buy
Reasons to avoid
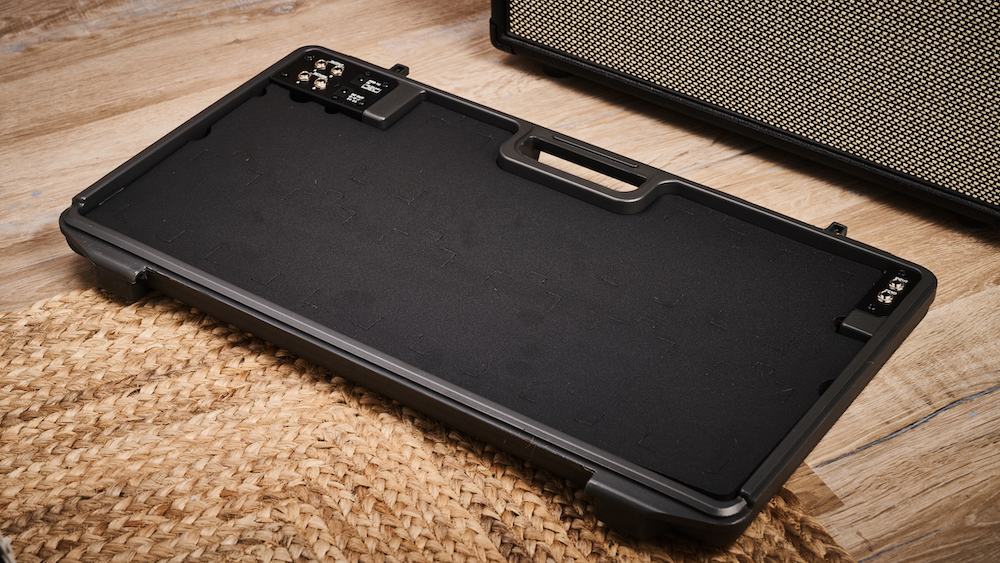
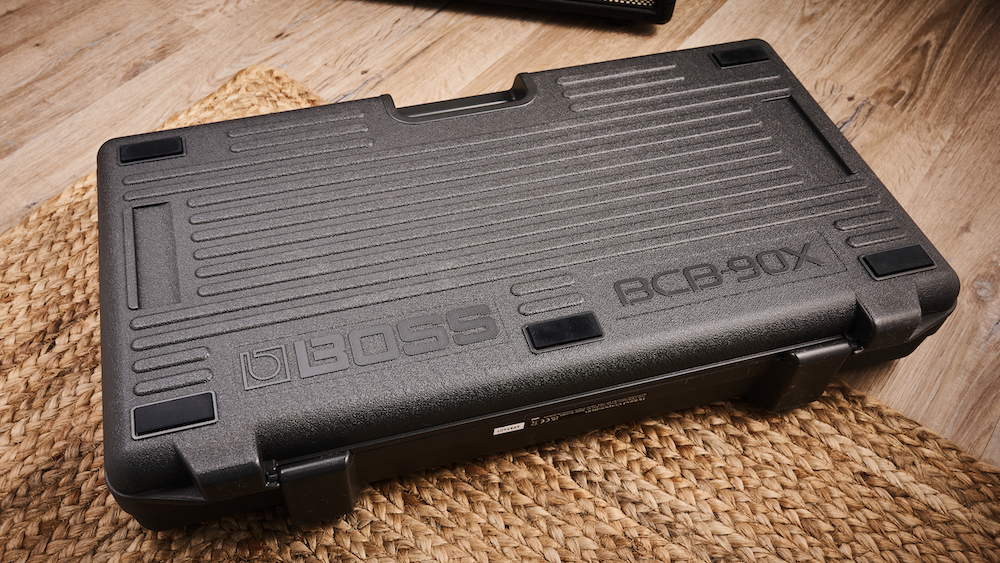
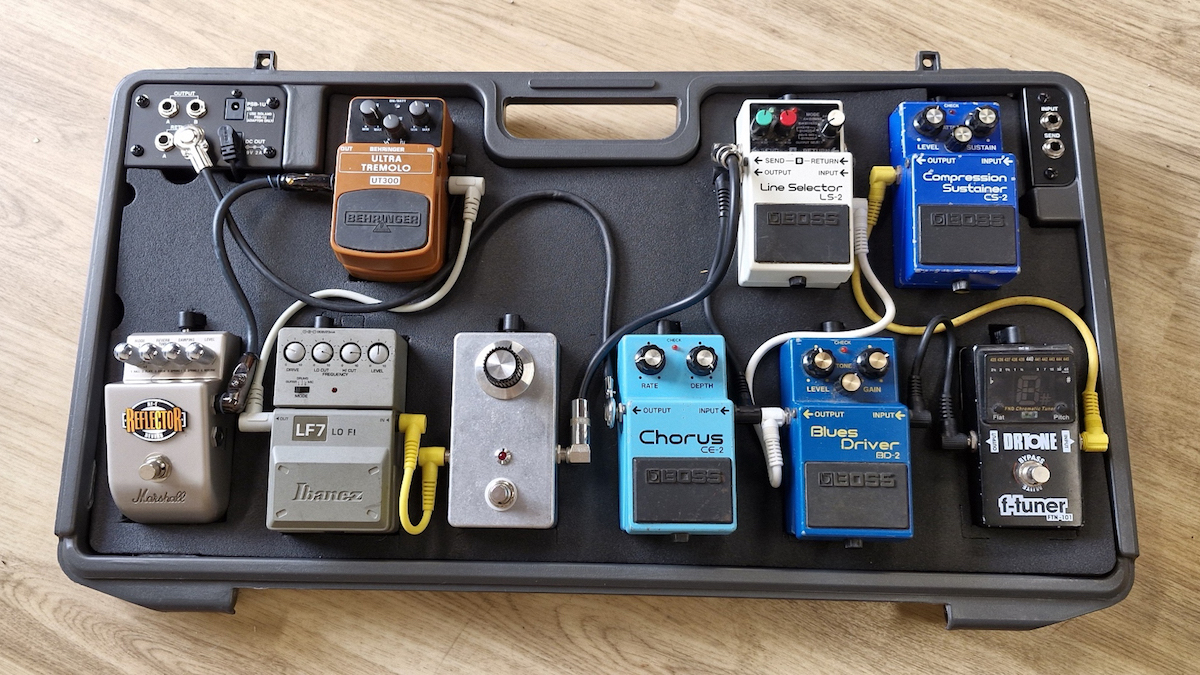
What is it? The Boss BCB-90X is a medium-format suitcase-style pedalboard from the ubiquitous pedal brand (is your signal chain really complete without one of Boss’ blocky industry-standard effects nestled somewhere betwixt?). It’s a ‘board pointed squarely at the entry-level, with some nifty integrated features that lean towards plug-and-play accessibility.
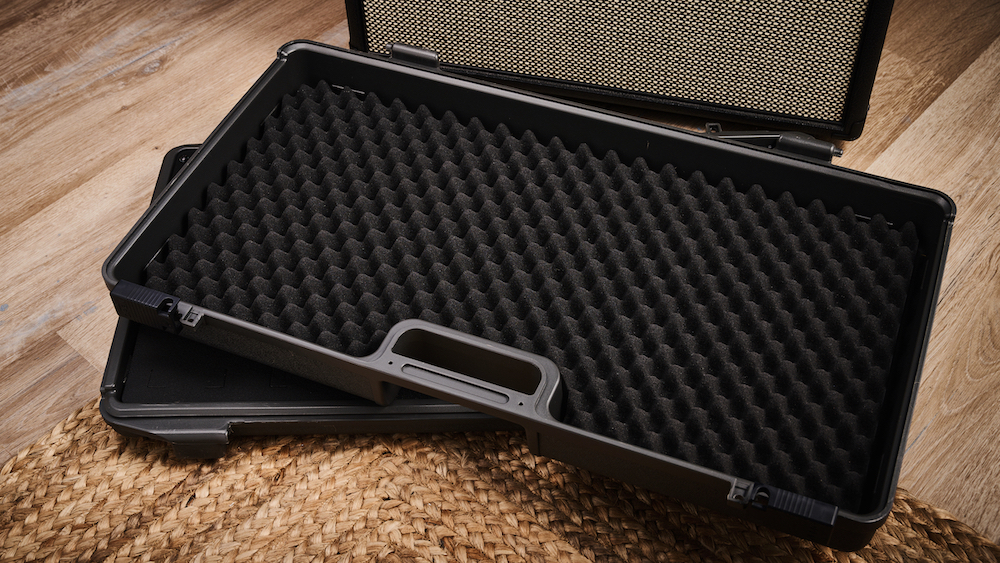
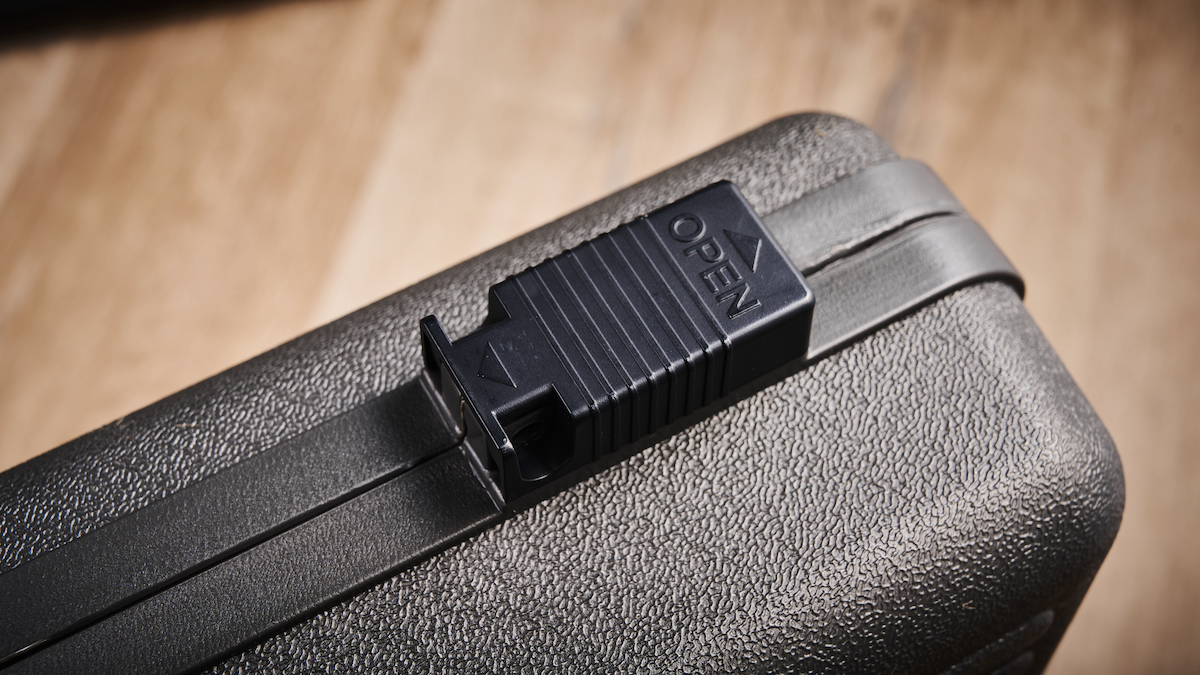
Build quality: The board itself is a briefcase-style thing, with a hinged lid and sliding clasps atop. The whole ‘chassis’ is injection-molded ABS, advantageous for its lightness, low cost and considerable knock-about-ability. It’s nowhere near as flimsy as it may look, as evidenced by the weight of it even when empty. Put bluntly – I deem it a trustworthy box for your pedals.
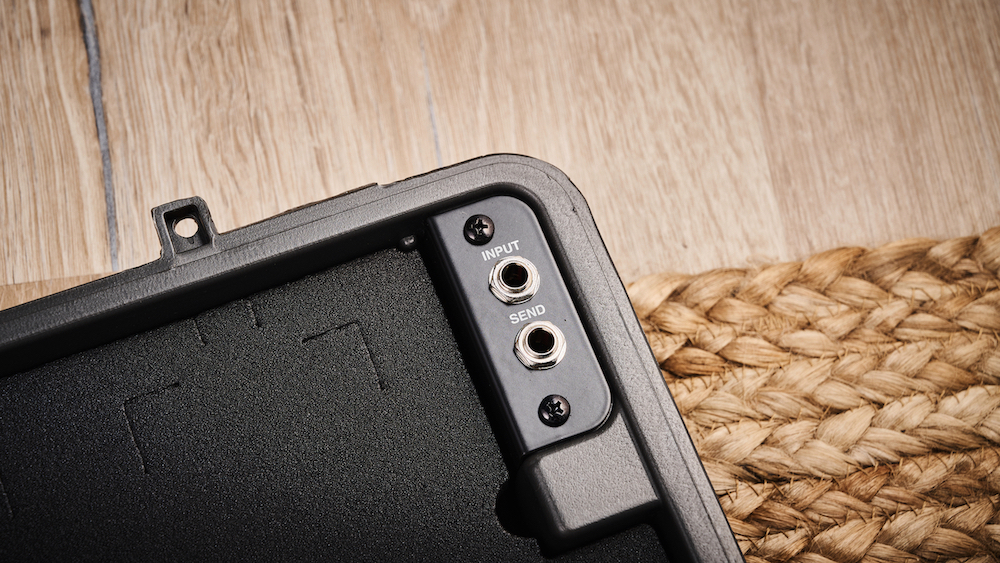
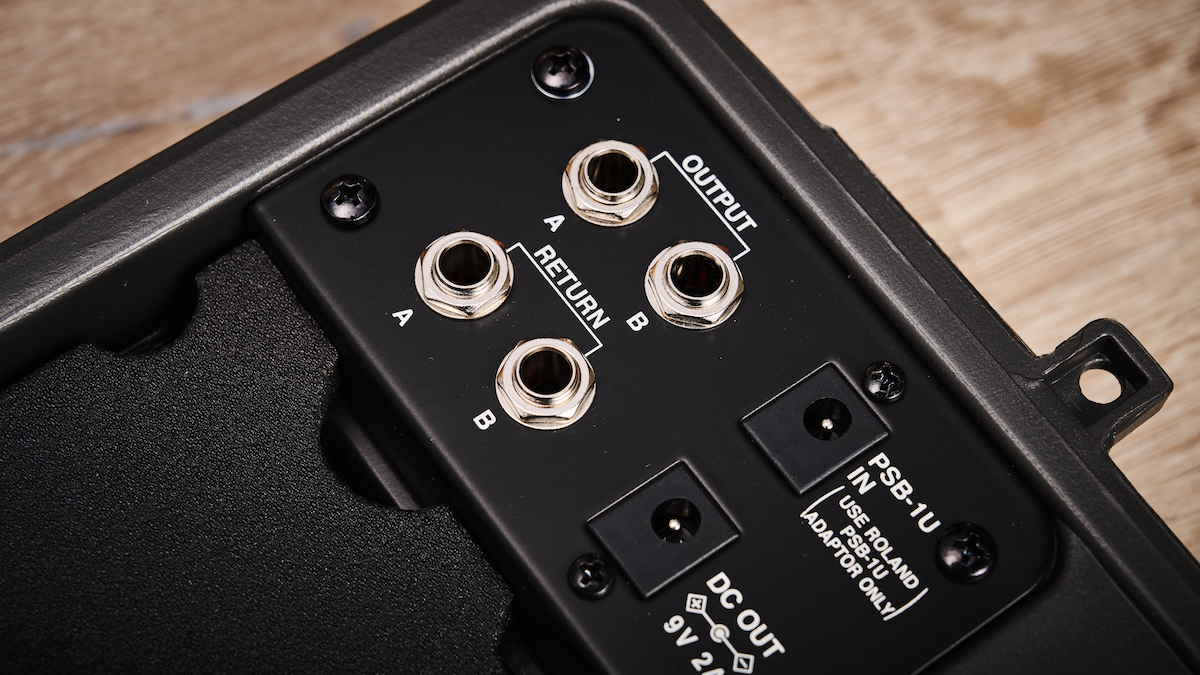
Key features: There are a few features that make the BCB-90X a great shout for the beginner (or indeed the Boss-fan). For one, there’s a built-in patch-bay for all your routing needs, with a single input and ‘send’ to your pedalboard, and two ‘returns’ and outputs for stereo rigs. There’s also a power throughput, into which you plug a wall-wart power supply kindly included with the case. This, and the included daisy-chain cable, means you can power all your pedals straight out of the BCB-90X’s box.
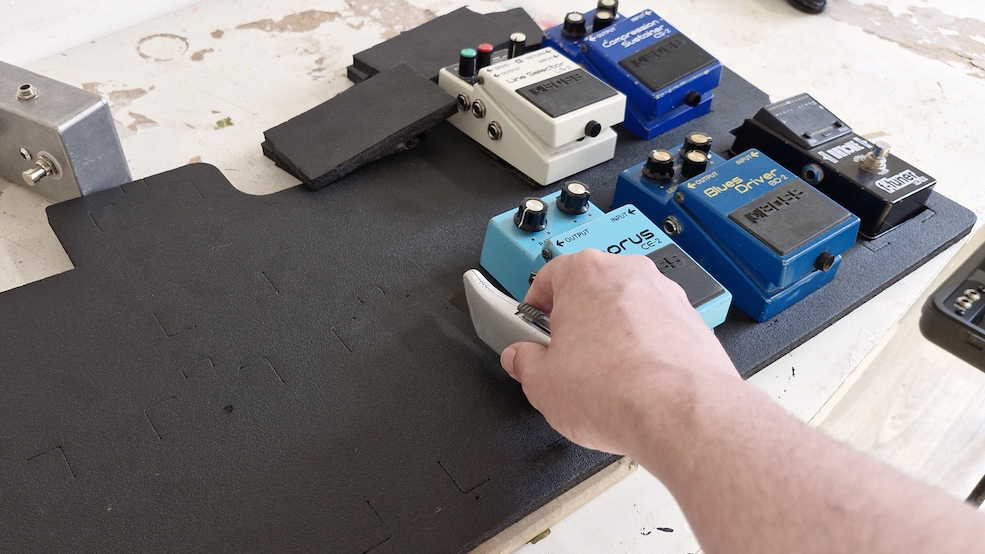
The pedals themselves are meant to be fixed in place by a foam sheet, into which you cut holes for them to sit. Under this, there are channels routed into the case’s mold for your power cables and longer audio cables to hide – a neat touch.
Performance: My first impressions of the Boss BCB-90X were mixed. There’s something quite disconcerting about the destructive nature of your first engagement with it; cutting the foam to make space for your pedals is a painfully irreversible procedure, and the method by which you remove the pedalboard’s lid in order to use it feels unusually gruff too.
Getting over my own prissiness, though, I found the BCB-90X to be a very accommodating suitcase-style ‘board – and despite the messy nature of cutting foam to accommodate one’s pedals, the finished and populated thing looks pretty darn neat. I did find that the softness of the foam pedal template made for a less-sturdy experience under-foot, but my pedals didn’t go anywhere even with some more animated stomping and shuffling.
Final verdict: The Boss BCB-90X is a highly practical pedalboard, for beginners but also for anyone with an analog or Boss-heavy pedal line-up. Everything’s neatly wrapped up into a single carry case, from a stereo-out patch bay to an easy-concealed daisy-chain power supply. It’s a great starter pedalboard for its accessibility and for its growth potential – though cutting into that foam might make you a little nervy…
Best for touring
4. Pedaltrain Classic 1
Our expert review:
Specifications
Reasons to buy
Reasons to avoid
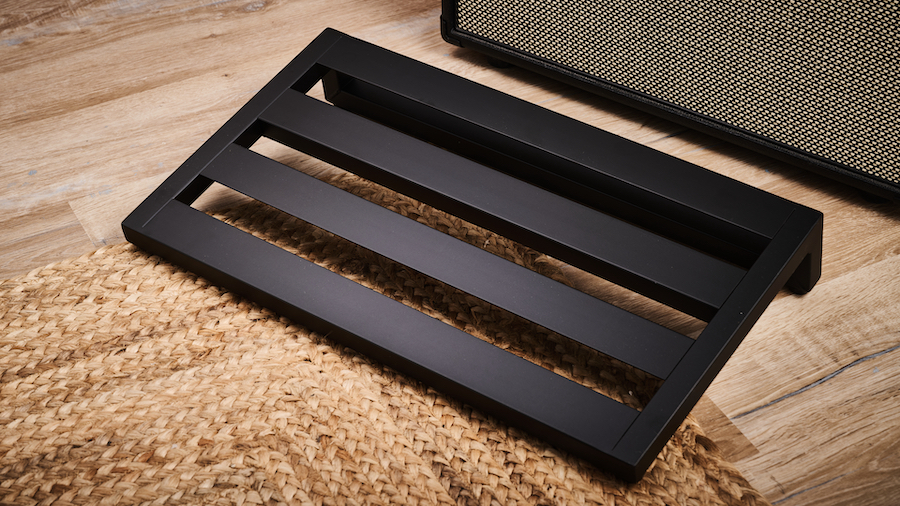
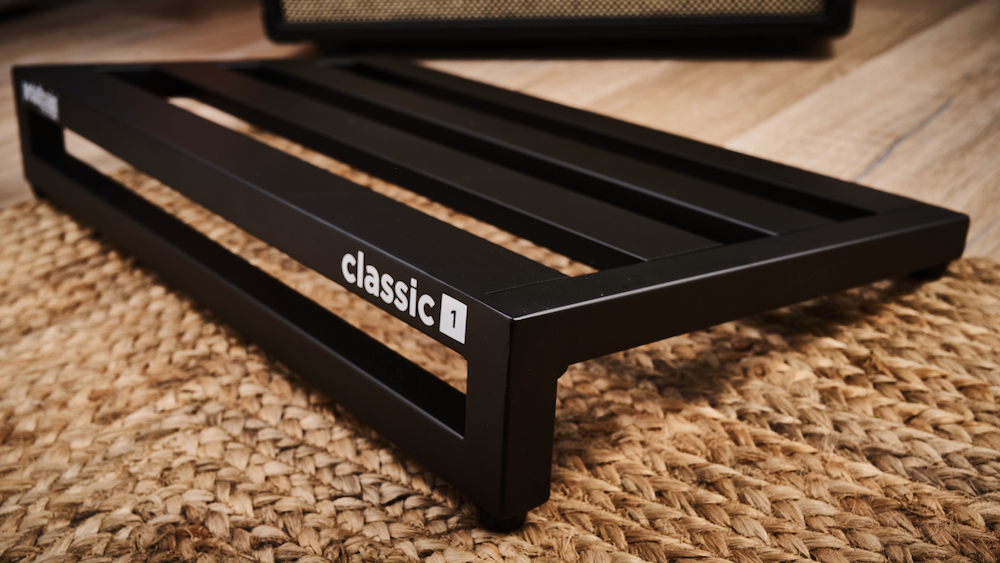
What is it? The Pedaltrain Classic 1 is a quintessential modern pedalboard, from the brand that arguably kickstarted our contemporary wave of pedal-platforming principles. It’s a slatted pedalboard constructed entirely from ‘aircraft grade’ aluminum, with four horizontal rails that accept your pedals while enabling prodigious access to the underside for cable-routing and power-hiding purposes.
Build quality: The whole thing is aluminum, and absolutely rock-solid for it. The welds are a little conspicuous – and the paint threatens to wear any chips quite prominently, but ultimately didn’t suffer during my own clumsy bangings-around. This is one of the more solid pedalboards in this guide, with practically no give under-foot; this is a reassuringly solid pedalboard, through and through.
Key features: There isn’t much to the Pedaltrain Classic 1 that you can’t already see. It’s an aluminum frame with a decent amount of topside surface area for mounting up to fifteen-ish pedals; it’s light but sturdy; and it’s got a fixed tilt for you to access everything you need. There’s no on-board power supply mounting, though Pedaltrain does sell mounting kits separately. Here, Velcro ended up being my friend for testing.
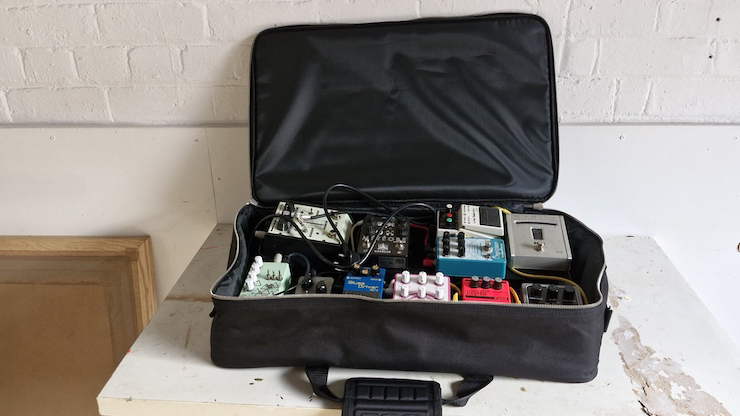
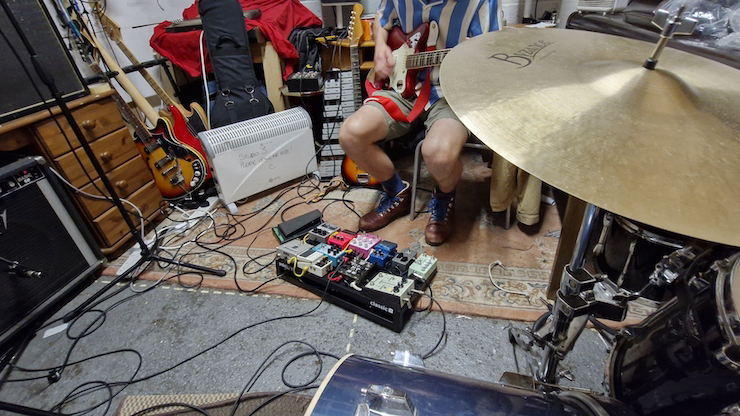
Performance: I ended up using the Pedaltrain Classic 1 as a straight-up stand-in for my usual live rig – a stereo setup which I usually spread across two boards out of both convenience and necessity. Many of the pedals I use are oversized, yet I could still cram about eleven on the Classic 1 without really struggling for space. The Classic 1 made running cables as simple as it could possibly be, with unparalleled access to and control over the underside.
My live sets often require a great deal of tapdancing to achieve the dynamic shifts the songs require (and because I’m too stubborn to buy myself a loop switcher). My tapdancing yielded no movement whatsoever from the Classic 1, which bodes well for its longevity on a longer sprint of rehearsals and shows.
Final verdict: The Pedaltrain Classic 1 is an easy choice, for its beautiful simplicity. It’s easy to set up, easy to troubleshoot and easy to move around – whether in your hands, by the supplied softcase or abroad in a flightcase. Its reliability as a solid piece of kit sees me recommending you get it if you’re in need of a touring workhorse – though I would suggest bumping yourself up to getting a flight case if you do.
Best lightweight
5. Voodoo Lab Dingbat Medium
Our expert review:
Specifications
Reasons to buy
Reasons to avoid
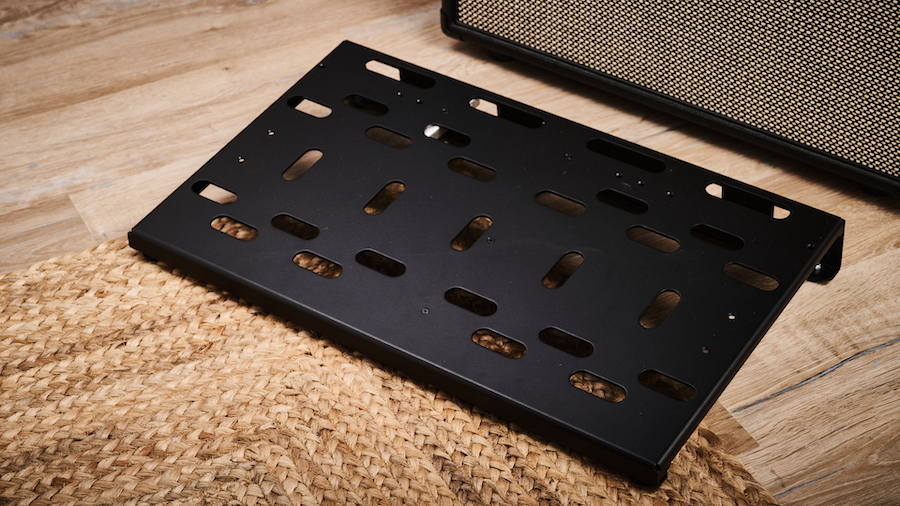
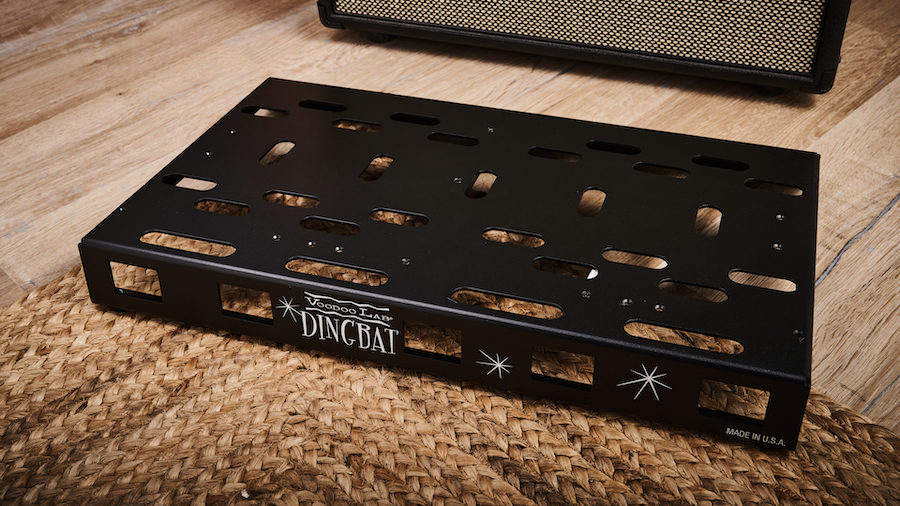
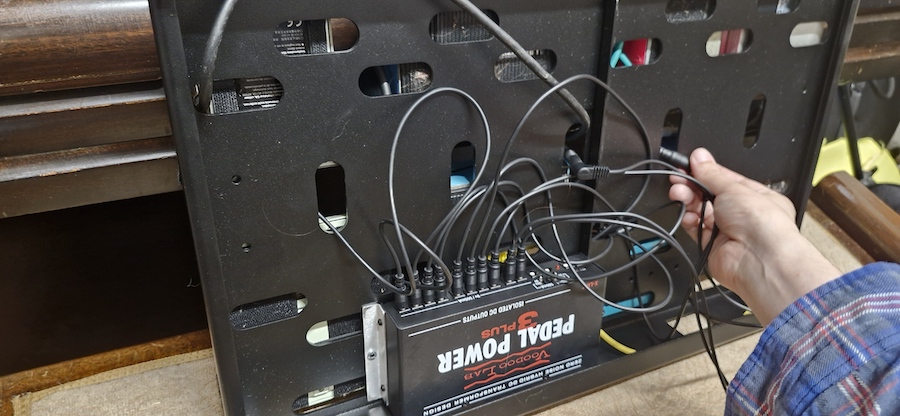
What is it? The Voodoo Lab Dingbat Medium comes from pedal power company Voodoo Lab’s Dingbat range of workhorse pedalboards. The Dingbats are lightweight, folded-aluminum wedge-style pedalboards, predisposed to receive Voodoo Labs’ own power supplies underneath; indeed, the Dingbats are available as bundles, with factory-installed Voodoo Lab Pedal Power units. The subject of this review is the Dingbat Medium with a factory-installed Pedal Power Plus 3.
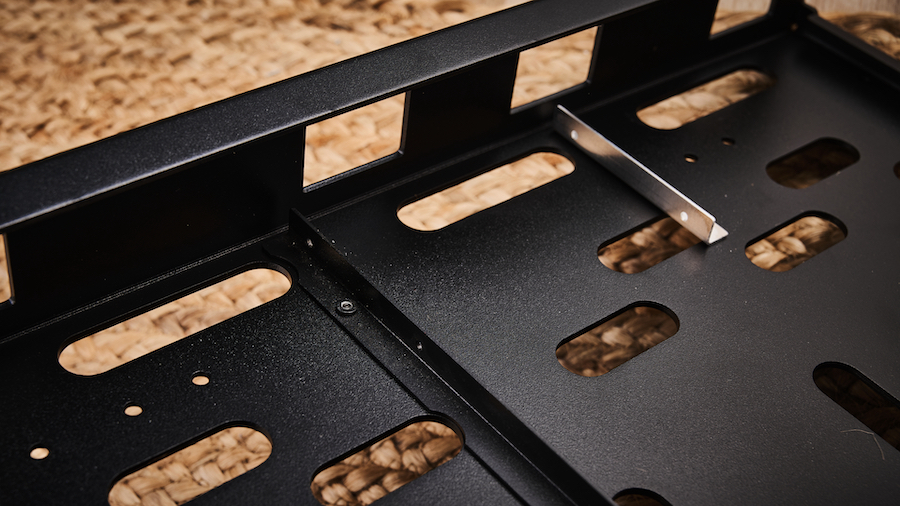
Build quality: The Dingbat is made from a single aluminum sheet, bent into its wedge-y shape and rendered quite robust as a result. Being a single sheet, though, there are a lot of edges and angles to catch yourself on. All have been safely rounded off and deburred, but I still didn’t find it the most fun to grab in a hurry.
Minor inconvenience aside, it’s a well-designed and well-made thing; the countersunk screw holes on the face of the board are a nice touch, making the attachment of power supply mounts and other object d’art as (literally speaking) smooth a reality as possible. That minimal single-sheet design pays off in the weight department, too – you’ll not notice the extra metal on top of the existing weight of your signal chain.
Key features: The Dingbat’s lightness in weight and design make it light on features, too – but there are still some smart little decisions that make a big difference. Clever and generous distribution of access cutouts across the face made cable runs and management remarkably simple, and the setting-up and breaking-down of different signal chains remarkably easy.
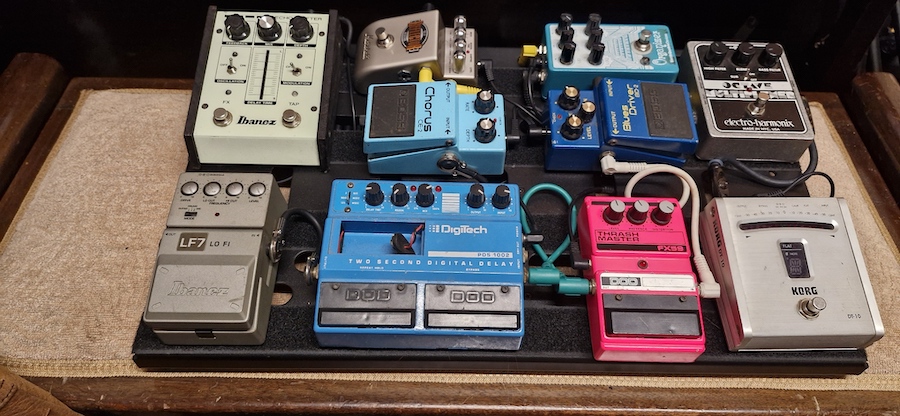
Performance: The Dingbat Medium feels great to play with. Some guitarists quietly resent the fixed angles that such wedge-type pedalboards impose, but the lift on the Dingbat feels good and natural; accessing the rear row of pedals (even that pesky tap tempo towards the top right) wasn’t at all arduous. Despite the thin, single-sheet aluminum construction, the pedalboard was rewardingly stiff beneath my stompers.
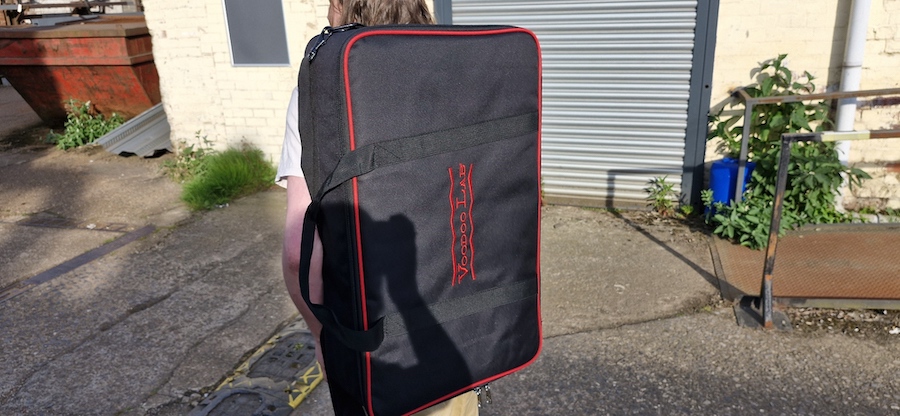
The Dingbat Medium’s carry case is easily the best thought-out soft case of the bunch; two backpack-style shoulder straps, a longer over-shoulder strap and carry handles on the side mean it can be carried any which way without fuss. Transporting this ‘board to and from sessions was uniquely comfortable – enough, at least, for me to wax prosaic about it for about a quarter of my review. Guitarists get back ache too!
Final verdict: I really enjoyed my time with the Voodoo Lab Dingbat Medium, even if just for the ease with which I could take it from A to B. The solid pre-configured mounting capabilities are stress-relieving to say the least – and the ‘board is ideally sized for most gigging needs too.
Best for vintage pedals
6. Aclam Smart Track S2
Our expert review:
Specifications
Reasons to buy
Reasons to avoid
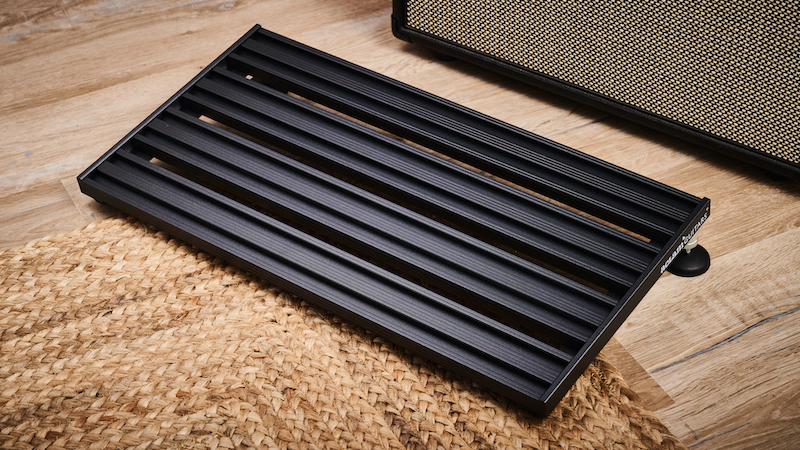
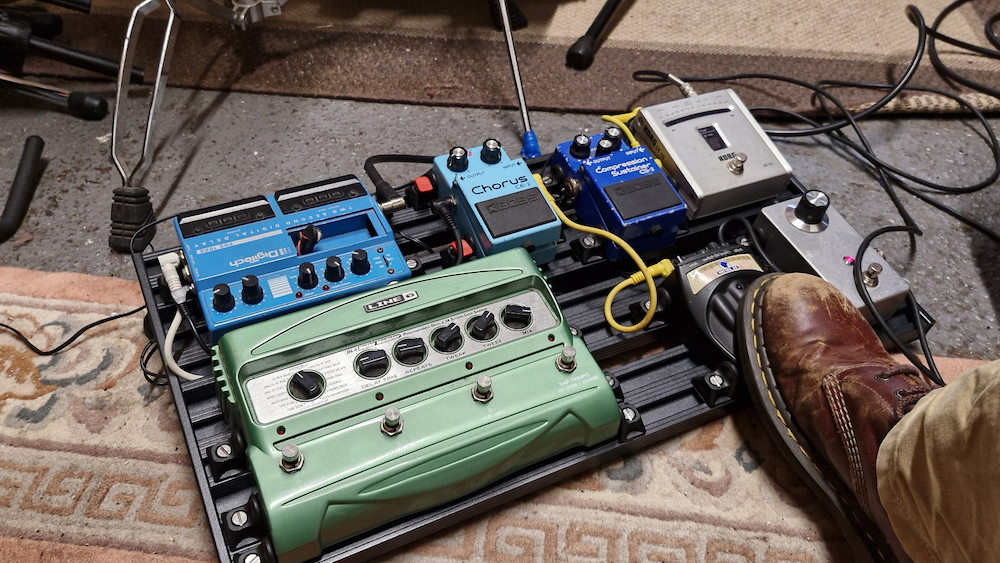
What is it? The Aclam Smart Track S2 is a pedalboard that dares to ask, “is Velcro the best we can do?” Many pedalboard companies have asked this question before, but Aclam’s own answer is a unique and sturdy one. The S2 is a medium-sized ‘board, sized for 10-ish pedals, and which utilizes Aclam’s own Smart Track system to clamp pedals in place without the need for hook-and-loop – and without having to adapt your pedals either.
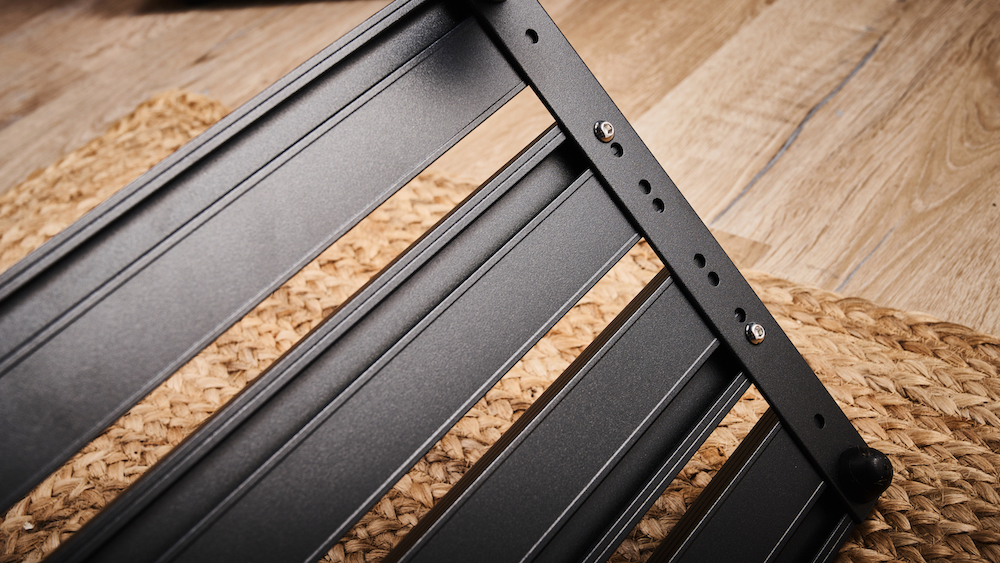
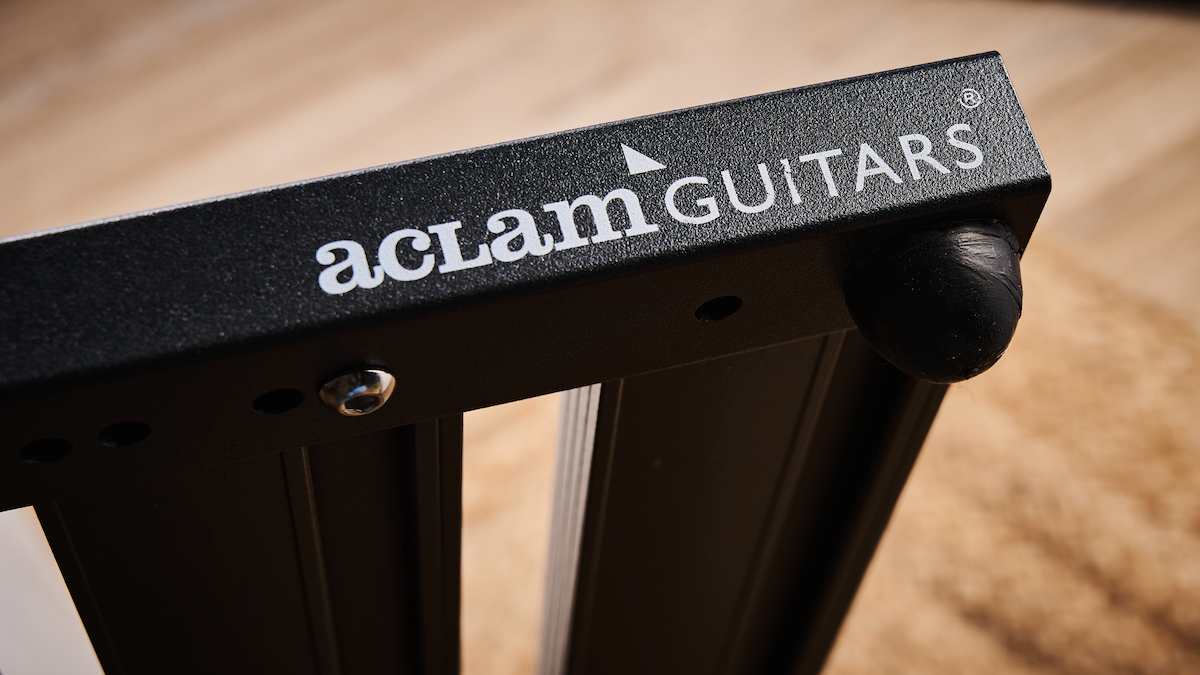
Build quality: The Smart Track S2 feels nice, weighty and solid to handle. The fastening accoutrements that make the S2 what it is are plastic, with well-adhered rubber end-caps and a screw-based locking mechanism. Everything is smartly designed and, frankly, feels great to engage with.
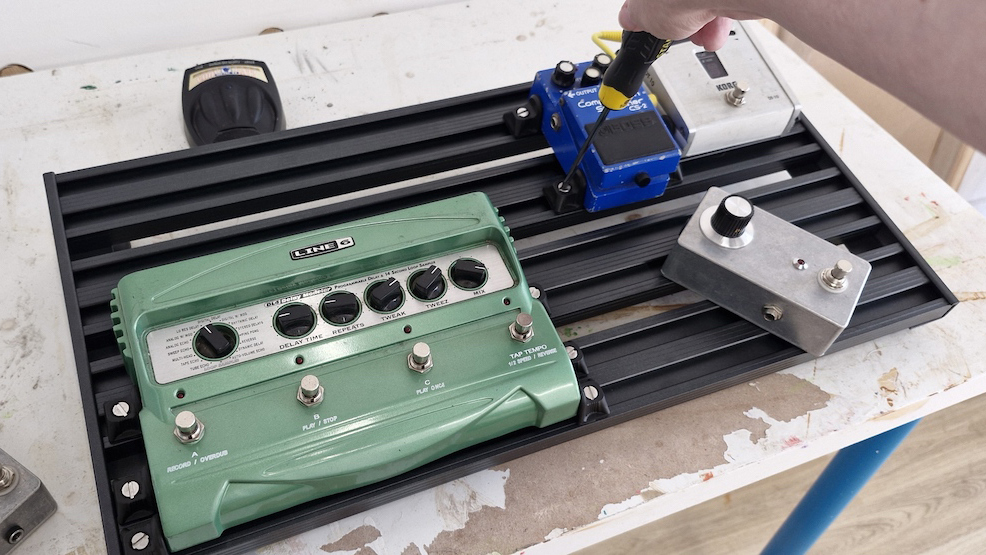
Key features: The Aclam Smart Track S2 is unique for the sturdy, mess-free way it accepts pedals. The Smart Track system uses rubber-capped fasteners to squeeze pedals into place and hold them there, with a combination of friction and compression – advantageous in that it saves your favorite vintage pedals from being bespoiled by sticky hook-and-loop adhesive.
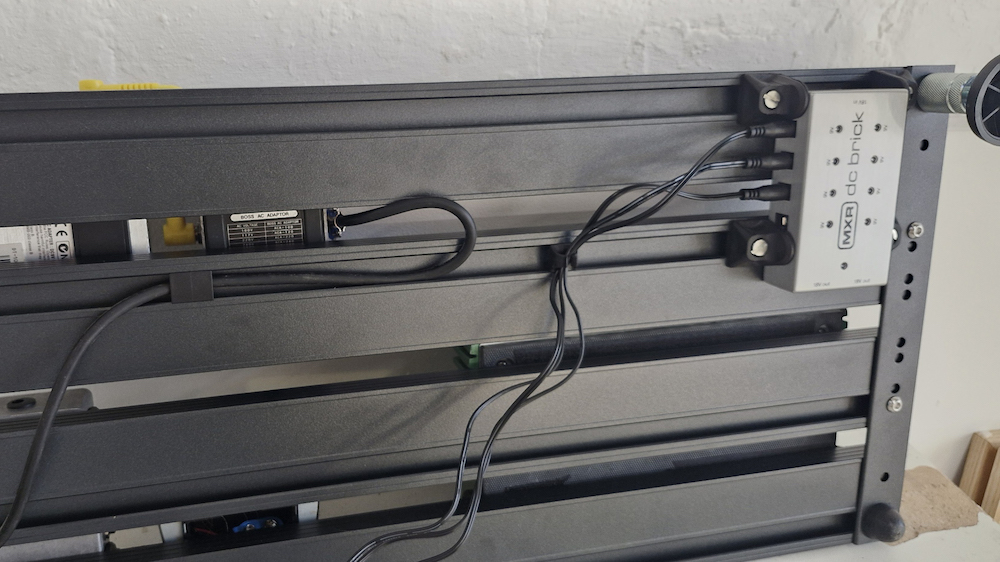
The rail-based system makes this a very adaptable board, with a huge amount of potential for neatness too; the rails are on both sides of the board, so you could feasibly use the same Smart Track fittings to secure your power supply in place (though Aclam do sell a separate pedal power mount for a less daring fit). Push-fit clips are provided too, to help aid you with cable management beneath.
Performance: Setting up the S2 for the first time was, admittedly, a little frustrating. There’s a knack to twisting the locking mechanism into place without just tightening the screw into it gainlessly – and even with that knack, setting up is a time-consuming exercise. I had access to some of Aclam’s add-on Fast Fasteners (not included with the S2), and resorted to using them eventually; using them was an absolute tonic after the fiddliness of the standard fasteners. That said, the effort is ultimately worth it, whichever fasteners you’re using.
The feet are often a bit of an afterthought with pedalboards, but this certainly isn’t the case for the S2. The wide-based plastic feet are on ball joints, so happy acclimating to any surface; you can set their height independently via their screw threads, locking them in place with chunky knurled thumb nuts.
Final verdict: The Aclam was a bit of a time investment to set up, but showed its various strengths in practical usage thereafter. I’d absolutely recommend it as an at-home board, particularly for those who are precious about their vintage and valuable pedals – but please, for the love of God, spend a little extra for the quick-release fasteners, just for your own sake.
Also tested
These aren’t the only ‘boards I tested for this guide. Here’s a few more I ran the rule over.
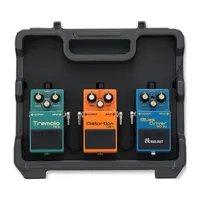
Boss BCB-30X
★★★★
The diminutive Boss pedalboard is a nifty little on-ramp for newcomers or minimalist Boss-fans; a three-pedal capacity, some hardy construction and a sub-$50 price point make setting up your first ‘board a cinch.
RockBoard by Warwick Tres 3.1
★★★★
This is a small-but-roomy angled pedalboard from the renowned bass-purveyors Warwick. It’s great, but perhaps shows its true quality with RockBoard’s swiss-army add-on modules. The Tres 3.1 represents a great deal of plug-and-play potential for the chop-and-change guitarist.
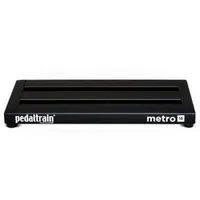
Pedaltrain Metro 16
★★★★½
The Metro 16 is a really good pedalboard for mounting around five to eight effects pedals, throwing them in the nylon shoulder bag, and running out the door to practice. Even if you only have three or four right now, the extra space will come in handy when you inevitably size up the floor show.
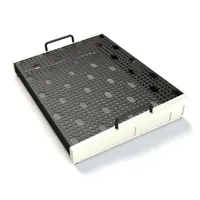
Temple Audio Duo 17
★★★★½
The Temple Audio Duo 17 is perfect for those who want to keep their ‘boards looking clean and fresh as much as possible. There’s space to run cables and arrange your pedals as you choose, and Temple’s own Quick Release pedal mounts mean you can fix your pedals down without the hassle of velcro or other strong adhesives.
How to choose the best pedalboard for you
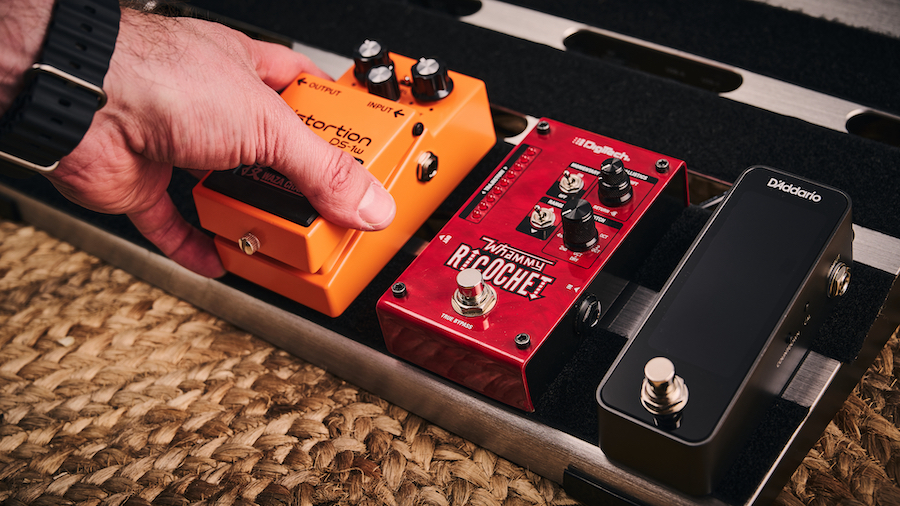
If you’re reading this guide, chances are you’re trying to find the best guitar pedalboard for your needs. There are several things you should consider before buying.
1. How many pedals do you have?
The most fundamental factor in choosing the right pedalboard for you is size. How many pedals do you have in active rotation, and how long is your signal chain usually? Needless to say, a stereo-signal ambient space-rock rig won’t quite fit on a single-row pedalboard, and a travelling busker probably doesn’t need a surface the size of a dinner table to affix their tuner and loop pedal to.
Medium-sized pedalboards are a great middle ground, often fitting between eight and 12 pedals. If your needs are austere, a small-size board that fits up to five would be more than enough – and if you’ve designs on something a bit more Kevin-Shields-y, you’ll want to go much bigger.
2. …and how many more might you get?
No one pedalboard is ever truly finished. Pedals come and go, signal chains expand and shrink, making your pedalboard’s results a veritable ‘tone of Theseus’. Whatever the future of your board, the question is how much your needs could stand to grow, when it comes to space.
If you’re fairly happy with what you have, then you won’t want a larger board than you need. However, if you like the idea of having more room for maneuver, then you might want to get a board with a little extra space on tap – or a board that’ll accept additional risers and extensions with ease. For the truly indecisive, some boards, like the D’Addario XPND series, have telescopic rails and can expand easily according to your ever-changing needs
3. How settled is your signal chain?
Of course, some pedalboards are a lot less settled than others. You might split your time between different projects, each of which have different tone requirements; you might be a session guitarist working to new briefs each day; you might simply be an indecisive player with a library of effects to vacillate between. In any of these cases, you’ll want to be able to switch and change your pedals with ease. You might value having easy access to all your pedal inputs and outputs, or a quick-release mechanism for holding your pedals in place.
If you’ve found your ideal tone, are touring the same rig for some time, or even just want to ensure your pristine vintage pedals are safely locked in place, you might prefer to go for a pedalboard with a more robust, immovable pedal-fastening mechanism. You might also value a pedalboard that enables you to properly secure your guitar cables and I/O out of sight, out of mind.
4. Is your pedalboard going on the road?
If you’re taking your pedalboard out on tour or to regular gigs, then you need to be thinking about features that make setting up and playing as reliable and convenient a process as possible. All of the pedalboards I’ve reviewed are more than suitable for gigging life, but some have an edge over others – whether with better facilities for cable management, space for a setup-simplifying patch bay or throughput, or coming with a bombproof travel case.
5. Do you need pedal power?
Finally, do you already have a pedalboard power supply? Getting a separate one is highly recommended, but there are pedalboards out there with their own built-in pedal power – which can be a godsend for players on a budget, or players who don’t know much about powering their pedals just yet.
FAQs
What is a pedalboard?
Unlike many of the terms in the world of guitar that can confuse and obfuscate, the pedalboard is very much what it says on the tin; a board onto which you mount your effects pedals. Pedalboards can be as simple as a plank of wood with Velcro attached, but today’s purpose-built pedalboards are far more sophisticated – whether cleverly constructed from aluminum rails or designed to make cable routing a breeze.
Why do I need a pedalboard?
Pedalboards are highly useful pieces of kit for a few reasons, but the key word here is ‘simplified’. Setup time is at a premium whether you’re regularly gigging, recording in studios or even desperate to catch a song idea in your home studio; building your pedal chain from scratch in any scenario just isn’t practical! A pedalboard means you can have everything plugged-in and ready to go, with minimal fuss and minimal tripping hazards too.
How much do pedalboards cost?
Pedalboards can vary hugely in price, from small boards that come in at budget price points, to bomb-proof behemoths with correspondingly-large asking prices. As with any product, there will be examples aplenty of cheap and cheerful pedalboards on Amazon and AliExpress, the likes of which you wouldn’t trust in a light wind; however, even the most affordable pedalboards from recognized brands are generally highly durable – though often smaller, and hence only suitable for lightweight pedal rigs.
Generally speaking, the more you spend on a pedalboard, the more you can expect for your money – namely, more space, more versatility, and/or more ruggedness. Higher-priced pedalboards with a small footprint might come with a padded carry case, or even a hardwearing flight case for safer transport. Larger pedalboards may benefit from better build quality, or clever design for the easy routing of cables.
How do I attach my pedals?
The most popular way of attaching pedals to your board is using hook and loop fastening – otherwise known as Velcro. Simply attach the loop side to your pedalboard and the hook side to your pedals themselves, then simply stick them on your board in your preferred order. Putting the loop side on the board can make cleaning it easier, as well as saving your knuckles from nasty scratches when it comes time to rearrange your effects; besides, some pedalboards will come with the loop side already attached, so you can quickly add and remove pedals.
Hook and loop isn’t the only way to fasten pedals, though. Indeed, the best pedalboards are designed with different fastening approaches in mind. For instance, Temple Audio pedalboards accept proprietary mounting plates, which attach to your pedals and clip them securely into place; Aclam pedalboards have their own clamping mechanism built-in, which allows you to secure pedals in place without potentially marring them with adhesive. Finally, some pedalboards, such as the BOSS BCB-30X and BCB-90X have foam cutouts ready for your favorite Boss pedals to slot straight into – though some aftermarket modification may be necessary if you want to fit pedals from other brands…
How do I set up my pedalboard?
Attaching your pedals to the board is part one of your pedal-building process; the next part is plugging everything in. Every pedalboard has at least two different kinds of cable to think about routing: audio cables, and power cables. With CV control and MIDI routing, more complicated boards could have double the cables to wrangle. Cable management is the name of the game here, as some smart plugging and fastening can help keep your board both beautifully clean and easy to work on if something goes wrong.
If you’re set on your pedals and know the spaces between each on your board, you can buy patch cable-making kits, ensuring you have the absolute perfect cable length between your pedals. These kits are often more expensive than pre-made cables, however if you are serious about cable management, this may be something you want to explore.
The best pedalboards will have space to mount your power supply out of the way, so it doesn’t intrude on precious pedal space. This is typically on the bottom of the board, however almost all pedalboards will have space to run the power cables from underneath to the pedals on top. This means that on the surface cables can be pretty tidy… though underneath can still be chaos. Cable ties are your best friend for cable management, and some pedalboards – like the Fender Professional Medium – are clever enough to have dedicated anchor points for exactly this. It may take a little time to fasten everything down neatly, but trust me – your future self will thank you.
How do I choose the right size pedalboard?
With so many different sizes of pedalboard available, how do you pick which size to go for? After all, you might have a voluminous collection of pedals to pick from, but no intention of using them all in your signal chain. A good-sized pedalboard is one with more than enough space to fit your tried-and-true favorite pedals, and with room for some additions if your needs change. There’s nothing wrong with building a super-huge has-everything pedalboard; just remember it’s you that has to take it to rehearsals and shows!
Also, consider that not all pedals are the same size. While the majority of stompboxes will share similar dimensions, some of our favorite pedals have a much larger footprint, such as Strymon’s Big Sky, or the original Electro Harmonix Memory Man. These take up far more real estate, so a board that claims to fit ten stompboxes may only manage six or seven of yours.
Laying out your pedals, with space for patch and power cables, will give you a good idea of the pedalboard real-estate you need. If you’re unsure of what size you’re looking for, some pedalboards have facilities that enable you to increase available space; the D’Addario XPND series can expand telescopically, and many pedalboard brands (including Temple Audio) enable you to add a riser to give you another, higher row of pedals.
What’s the best guitar pedal order?
We’ll preface this by saying that there are no hard and fast rules to the order of pedals in your signal chain. That said, if you’re building your first pedalboard, there are certain best-practice decisions you can make that will help you get a great base sound to start with. We have a full article on how to arrange your pedalboard, but here are some quick tips for you to get you up and running quickly.
Firstly, put your tuner at the very start of your chain, to avoid pedal effects getting in the way of proper tuning. Dynamic effects like compressors and volume pedals could go either before or after, but the next pedals in your chain should be your dirt pedals – fuzz, overdrive, and distortion pedals more specifically. If you have a boost pedal you can add it after your drive pedals for a boost in volume, or before to help shape the tone of your guitar.
Time-based effects are best-served going at the end of your chain, and can sound even better in your amp’s FX loop if you have one. Modulation effects such as chorus, flanger, and phaser should go first, then your delay pedals, and finally reverb. This is where experimentation can yield rewards, though! Post-rock and shoegaze guitarists will put a reverb at the start of their chain, before their distortions, to get blown-out trails and a huge, washy sound. In short: if it sounds good, it is good!
Which pedalboard power supply should I choose?
Just as putting your pedals on a pedalboard can make setting up and playing easier, so too can investing in a pedalboard power supply – which gets juice to all your pedals without taking up much space, and without needing more than a single power outlet. Which one you get depends on a few factors – from the number of pedals you use to the space you have available on your pedalboard.
Whichever power supply you go for, make sure it caters to the power requirements of the pedals you have now and any pedals you might be interested in buying in the future. We would always recommend using isolated power supplies wherever possible, as they ensure you have the cleanest power to your pedals, without the risk of electrical interference which can produce noise/hum.
Some angled pedalboards will have space to mount a power supply underneath, keeping your board neat without compromising access to your cables. Depending on the pedalboard you ultimately pick, there may also be dedicated mounting kits that make it easy to install a certain power supply. If you’re not too confident in choosing a pedalboard power supply for your first pedalboard, then you might find it easier to get a pedalboard with an integrated power supply, like the Harley Benton Spaceship Power 40.
Glossary
There's a number of key terms you'll come across in relation to guitar pedalboards, whether that's in this guide or in conversation with your musical compadres. This glossary should help you cut through the jargon.
Cable management
Cable management is exactly as it sounds: the administration of your cables as they enter, navigate and/or exit your pedalboard. This essentially means routing them through, and fastening them to, your board in such a way that everything stays put, and every cable can be easily traced in the event of a problem.
Effects loop
An effects loop is an insert point in some guitar amps, that enables you to place pedals after the amp’s preamp section but before the power amp section. Tube amp preamps will color your signal on the way in, which could cloud up your pristine delays and reverbs; you might also want to use your amp’s onboard distortion, which also usually lives in the preamp.
Four-cable method
The four-cable method simply describes a pedal routing option that utilizes your amp’s effects loop. The four cables are: the cable from your guitar to your board; a cable from the first part of your pedalboard out to your amp; a cable from the send in your amp’s effects loop (after the preamp section) back to the second half of your pedalboard; and a final cable back to the return of your effects loop.
This method enables you to choose which pedals are colored by your preamp or amp distortion. Conventionally, guitarists will run compression and distortion pedals into the amp, then keep modulation and time-based effects in the effects loop for cleaner, sharper delay/reverb/chorus/obnoxious phaser. Some pedalboards have a patch bay (see patch bay) that makes the four-cable method much easier to set up in rehearsals or gigs.
Flight case
A flight case is a hard-wearing, internally-padded box designed for travel. Flight cases are designed to take the hardest of knocks, and could see your pedalboard come off a turbulent international flight without so much as a single cable out of place.
Hook and loop
Hook and loop is everyone’s favorite pedal-fastening device, more commonly known by the household brand name Velcro.
Loop switcher
A loop switcher is a device which brings control over your pedals to the front of your pedalboard. All pedals plug into the loop switcher, as opposed to into each other. Basic switchers simply enable you to engage or disengage the pedals in your signal chain via the on-board stomp switches. More complex loop switchers use digital switching to let you change the order of your pedals on the fly, or to group different pedal combinations into ‘scenes’ according to your songs or setlist.
Patch bay
A patch bay is a unit or device that manages connections for you. Pedalboard patch bays come in a variety of forms; Temple Audio and RockBoard pedalboards both have their own proprietary mod units, which fix into a slot on the back or side of the pedalboard.
On the rear, the patch bay connects to all of your pedalboard’s inputs and outputs – from audio to power to MIDI. The corresponding jacks on the front are where you plug in your guitar, connect to your amp, plug in mains power and potentially connect to MIDI devices. Now, rather than wearing the jack sockets on your pedals or testing the limits of your patience during load-in, all your I/O is in one place.
Power supply
If you have pedals, they probably need power! A pedalboard power supply is a dedicated device for getting power to all of your pedals. They come in a variety of forms, but the biggest variable is the number of outputs each offers. Some pedalboards, like the Harley Benton Spaceship Power series, have a power supply built in for convenience. If you want more control over your pedal power, you’ll want the best pedalboard power supply for your individual needs.
Riser
A riser is an add-on to your pedalboard, which can lift a pedal or set of pedals up above the rest. You might use a riser on a tight pedalboard to create some clearance, and make it possible to route a cable that wouldn’t otherwise fit; you might also use a riser to fit a wah or volume pedal over your board.
Tiered pedalboard
Tiered pedalboards use a stepped configuration to lift your rearmost pedals up above your frontmost pedals. This can make them easier to access when performing or create clearance for cable management beneath.
Throughput
A throughput is a female-female connector installed into your pedalboard, that allows you to extend an input or output from a pedal to the board itself. It is a single-connector equivalent to a patch bay.
How I tested these pedalboards
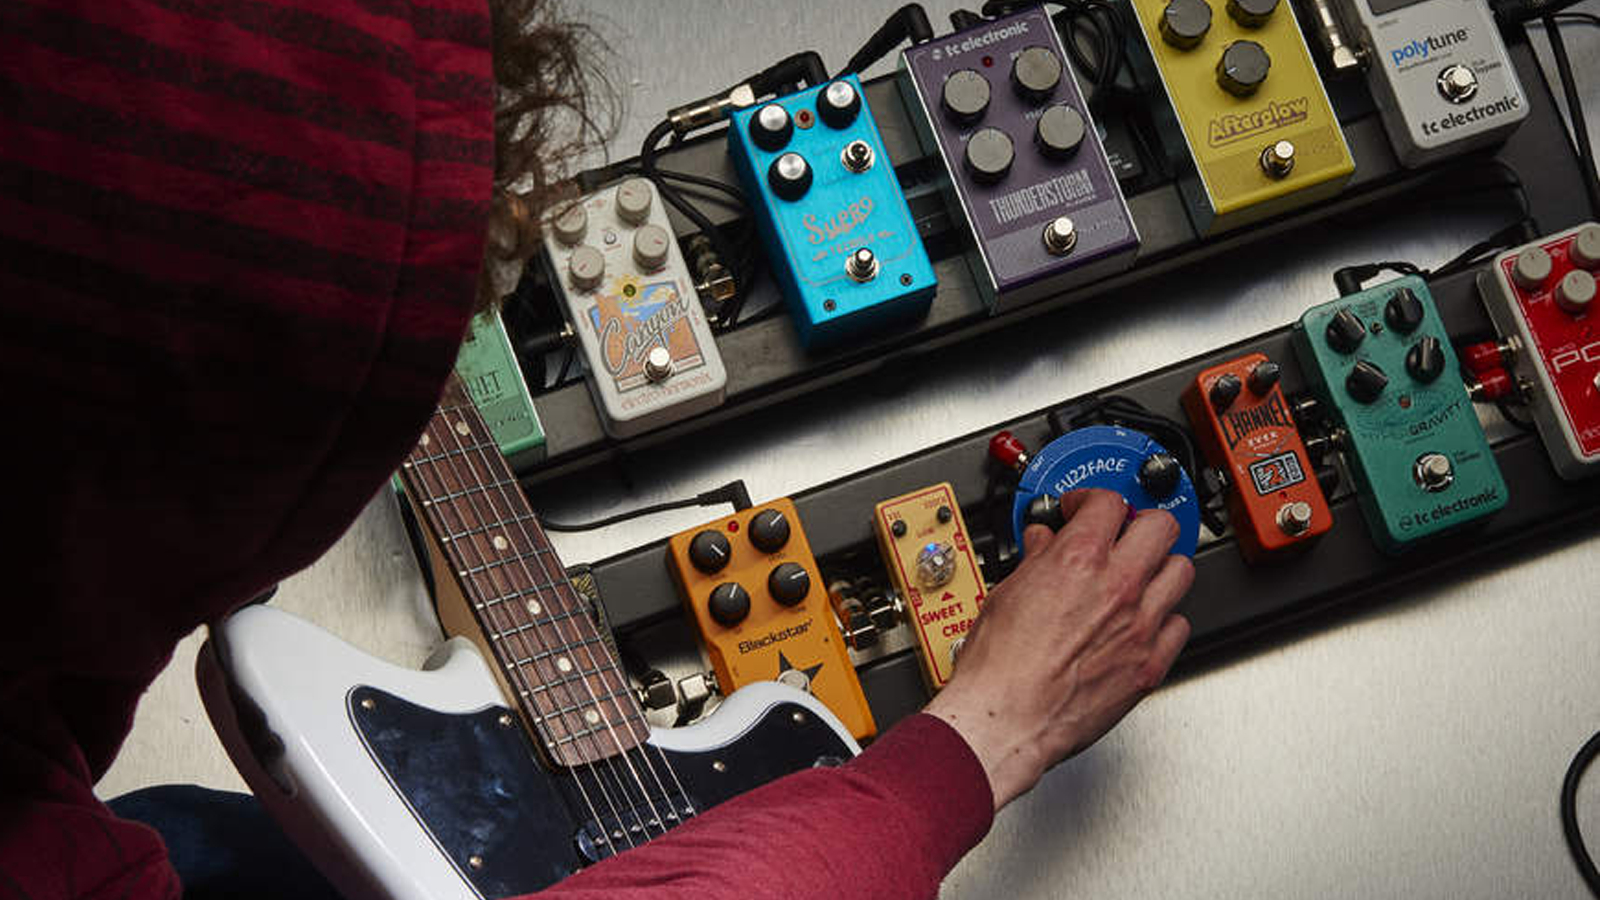
Every pedalboard that made an appearance in my guide was individually and attentively road-tested by me – but what does that mean, exactly? I’m an active, gigging musician that also co-runs a DIY recording studio space, so a lot of my creative time is spent between rehearsals, studio sessions and at-home demo-recording or songwriting endeavors.
Being a guitarist first, the guitar is often the instrument that I turn to first when I’m writing or recording for my own projects – and my familiarity with the instrument makes for some especially fun tracking sessions with the bands I work with. In either case, pedalboards are a vital part of my ecosystem – and I got to insert all of these pedalboards into that ecosystem for a little while.
Each pedalboard was loaded up towards its maximum capacity; I evaluated how easy it was to set a signal chain up each time, considering underside access and cable management. Each ‘board got a good airing in a variety of situations, including live rehearsals and recording sessions. I used them both stood up and while sitting, to get a feel for the comfort levels of each and the ease with which all pedals could be accessed. I was also looking out for the sturdiness of the pedalboards under-foot, from flex in the board itself to grip on different floor surfaces.
All the pedalboards had different accessories and accoutrements, from spare hook-and-loop tape and cable management options to travel cases and bags. These factored into the practical utility of each pedalboard and were evaluated accordingly.
In brief, the main factors that influenced my thinking with each pedalboard were: build quality; accessibility; portability; and comfort. Some were also straight-up fun to use in ways I hadn’t anticipated (here’s looking at you, D’Addario XPND 1!). Ultimately, I was looking to see which pedalboards could fit seamlessly into my own creative ecosystem on a more permanent basis – and everything reviewed here could do exactly that in one sense or another.
Read more about our rating system, how we choose the gear we feature, and exactly how we test each product.
Why trust us
✅ A global audience of 3.8 million guitarists monthly
✅ 1,200+ reviews on GuitarWorld.com
✅ 30+ years of product testing at Guitar World
Guitar World boasts over 44 years of expertise and stands as the ultimate authority on all things related to guitars. The magazine and website feature expertly written gear round-ups and top-quality, authoritative reviews penned by a team of highly experienced industry professionals.
Guitar World's inaugural print issue hit the shelves in July 1980, and ever since, it has been captivating players and enthusiasts with engaging lessons, insightful interviews with the most prominent guitar heroes, and priceless buying advice for newbie players.
Furthermore, GuitarWorld.com continues this legacy online and serves as the hub of the world's foremost authorities on guitar playing. The site not only hosts content from Guitar World but also showcases articles from respected publications such as Guitarist, Total Guitar, Guitar Techniques, and Bass Player. With a reach extending to 3.8 million players each month, GuitarWorld.com is a go-to destination for guitar fanatics globally.
Meet the experts
You can trust Guitar World

James Grimshaw is a freelance writer and music obsessive with over a decade of experience in music and audio writing. When he isn't blasting esoteric noise-rock around the house, he's playing out with esoteric noise-rock bands in DIY venues across the country; James will evangelise to you about Tera Melos until the sun comes up.
05/14/25: This guide has been overhauled from top-to-bottom. We called in 10 pedalboards from a range of brands and our writer tested them thoroughly at home, in the rehearsal room and on stage. As a result we have more thorough and honest opinions on each product. We've also taken loads of our own photographs so you can see each product in detail, from our perspective. Finally, we've added in-depth how to choose advice, a frequently asked questions section and a glossary of key terms.
Read more:
- Don't want a pedalboard? Try the best multi-effects pedals instead
- 12 killer cheap guitar pedals you need to try
- How to build a pedalboard on a budget
All the latest guitar news, interviews, lessons, reviews, deals and more, direct to your inbox!

James Grimshaw is a freelance writer and music obsessive with over a decade of experience in music and audio writing. He's lent his audio-tech opinions (amongst others) to the likes of Guitar World, MusicRadar and the London Evening Standard – before which, he covered everything music and Leeds through his section-editorship of national e-magazine The State Of The Arts. When he isn't blasting esoteric noise-rock around the house, he's playing out with esoteric noise-rock bands in DIY venues across the country; James will evangelise to you about Tera Melos until the sun comes up.
